Dental Photography Tips for Positioning
IMy previous article, “Flash Systems for Dental Photography,” highlighted the equipment and settings that are most ideal for dental photography. While these settings and equipment are essential, photographer positioning also plays a key role in producing great clinical photos. Different positioning considerations are necessary for direct and indirect photos. These dental photography tips will help you achieve the optimal clinical photos for supporting strong treatment outcomes.
Positioning tips for direct photos
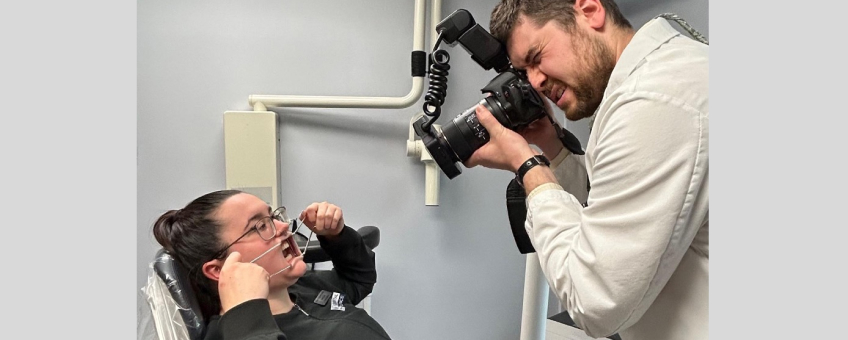
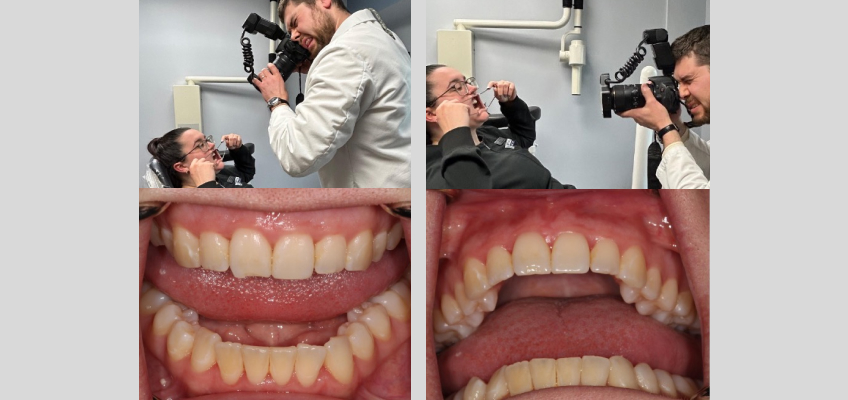
Direct photos are those taken without a mirror. These include extraoral headshots, repose, and frontal retraction shots. The key to positioning for these photos is to ensure the photographer keeps the camera parallel and in the same plane as the object being photographed.

If the photographer is on a different plane and not parallel to the subject, the resulting image will be distorted. This provides false information about the position of the head and teeth and will lead to issues when attempting to perform facially generated treatment planning.

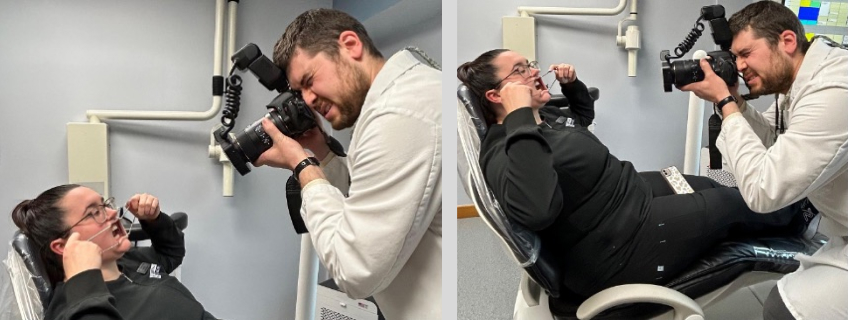
In many cases, asking patients to tilt their heads up or down may be necessary to achieve a parallel-angled shot. This can help them be placed in the proper plane without the photography compromising their ergonomics.

Fig. 3b: Ergonomic issues that can occur when the patient isn’t asked to move her head.
Positioning tips for indirect photos
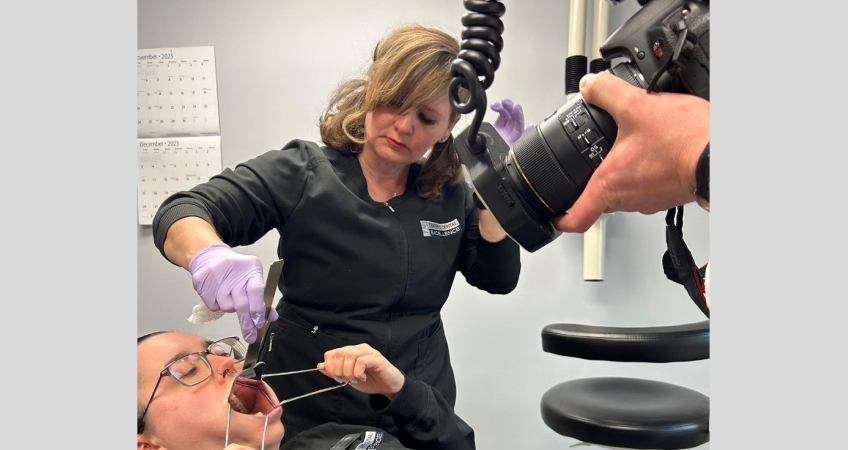
Indirect photos are those taken with a mirror — occlusal photos of the upper and lower arches, and lateral photos of the left and right sides of the mouth in maximum intercuspation.
Positioning for indirect photos requires additional skill and consideration. Because the photo is being taken using a mirror, it’s imperative the photographer be in the proper position to prevent any distortion. In particular, the photographer must position the camera at a 45° angle to the mirror while an assistant holds the mirror at a 45° angle to the teeth.
By positioning the camera and mirror in this manner, the photo will appear to be a direct image of the teeth being photographed. If the proper angulation is not attained, the image will be distorted and provide inaccurate information for treatment planning.

Photographer positioning is crucial for direct and indirect photos, which is key to creating accurate, undistorted images. Following these dental photography tips will ensure the photographer is positioned correctly. Additionally, guiding the patient to position their head accordingly helps produce the most ideal clinical photos for treatment planning and case presentations.
SPEAR campus
Hands-On Learning in Spear Workshops
With enhanced safety and sterilization measures in place, the Spear Campus is now reopened for hands-on clinical CE workshops. As you consider a trip to Scottsdale, please visit our campus page for more details, including information on instructors, CE curricula and dates that will work for your schedule.

By: Andy Janiga
Date: May 7, 2024
Featured Digest articles
Insights and advice from Spear Faculty and industry experts


