The Importance of White Balance in Dental Photography
In my previous article on “Dental Photography 101,” we highlighted the three main components of exposure: aperture, shutter speed, and ISO. Although these three settings are the pillars of creating great digital photographs, an often-forgotten “setting of “white balance” ”white balance” setting in dental photography is also critical to achieving high-quality exposures.
What is White Balance?
White balance is a camera setting used to determine the color of white. Depending on the light source, a white object may not appear white. White balance helps to correct this color discrepancy.
Different light sources will have either a “warmness” or a “coolness” associated with them. This is commonly referred to as the “color temperature.” Color temperature is measured in Kelvin, where a lower Kelvin value is associated with warmer, red colors and a higher Kelvin value is associated with cooler, blue colors.
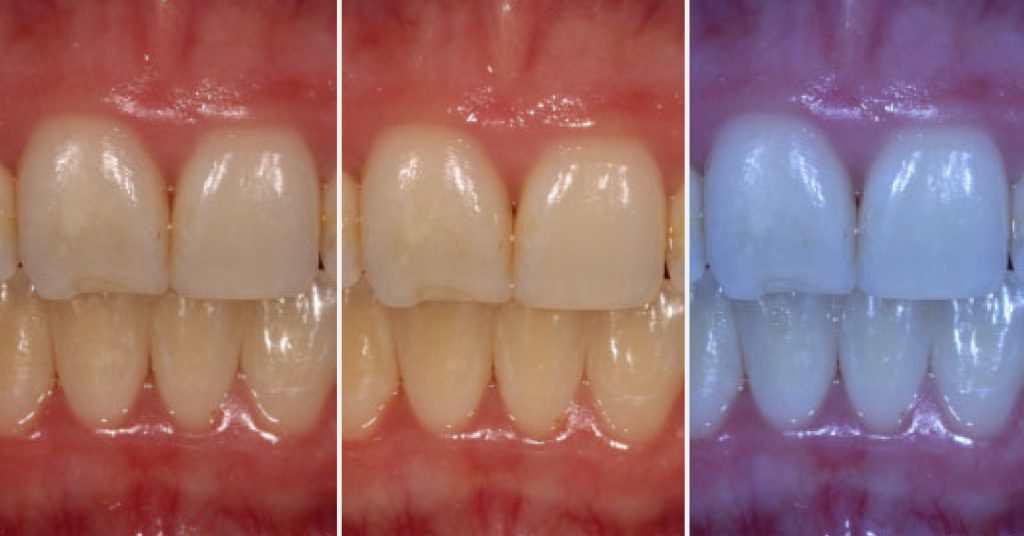
The white balance helps dictate the warmth or coolness of the colors when an exposure is captured. Setting the white balance enables the camera to consider the color of the surrounding light when the image is exposed. When the white balance is not set correctly, images may appear to have red tones (too warm) or blue tones (too cool).

The color temperature was incorporated into the film when analog film was used for photography. As a result, photographers occasionally use different color filters to make color adjustments based on the type of film being used.
With digital photography, the white balance can be controlled much more simply. Most camera bodies have an option to adjust the white balance on the settings home screen. To simplify the selection options for white balance, many manufacturers have preprogrammed, scene-specific settings (such as “daylight,” “cloudy,” “tungsten,” or “flash”).
White Balance Settings for Dental Photography
As discussed above, there are many different options for setting the white balance. For dental clinical photography, a white balance setting of approximately 5500 Kelvin is most appropriate. This Kelvin value will commonly be found in the “Flash” white balance setting for most cameras.

The proper white balance setting in dental photography is essential to producing high-quality clinical photos. Consider adjusting the white balance for proper exposure if your clinical photos look too red or too blue.
SPEAR STUDY CLUB
Join a Club and Unite with
Like-Minded Peers
In virtual meetings or in-person, Study Club encourages collaboration on exclusive, real-world cases supported by curriculum from the industry leader in dental CE. Find the club closest to you today!

By: Andy Janiga
Date: November 14, 2023
Featured Digest articles
Insights and advice from Spear Faculty and industry experts


