Clinical Sequence of Steps in Relining Provisional Shell Restorations
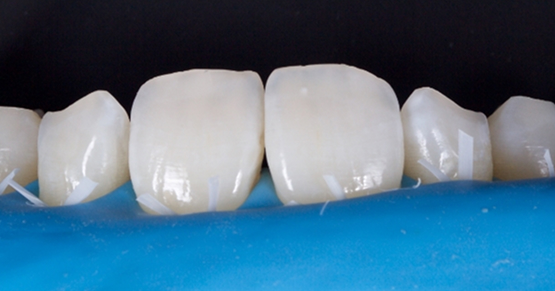
In a previous article, I discussed the three options in fabricating a provisional shell restoration. This type of provisional is best suited for full crown preparations. It can be made for veneer preparations; however, it is more difficult to accomplish the initial passive fit of the shell to the preps. This is due to the complexity and variability of the marginal designs that can be encountered with veneers.
- Use silicone reduction guides made from the diagnostic wax-up to confirm that you have the appropriate amount of space required for the definitive restorative material.
- If the provisional shell contacts a tooth preparation, determine where the reduction needs to occur.
- If the shell is too thick relative to the thickness of the final restoration, grind inside of the shell provisional in order to allow a passive fit over the preparation.
- If the shell is the appropriate thickness, the preparation should be altered to assure the desired morphology of the definitive restoration is achievable.
- Micro air-abrade the inside of the shell with 50µ aluminum oxide (not required but highly recommended to increase bond strength).
- Apply an adhesive (ie. 3M Single Bond) in the occlusal third of the central incisors and cuspids if the provisional is for the anterior segment or a full arch.
- Place a small amount of composite into the occlusal third of these teeth and place the provisional on the teeth. Seat the provisional to level the occlusal plane and confirm the length of the central incisors by measuring the length from the free gingival margin (soft tissue) to the incisal edge of the provisional.
- Have the patient stand in front of you to confirm level and midline.
- Light cure the composite.
- Apply an adhesive inside the provisional; extend the adhesive 1-2 mm on the outer surfaces of the gingival third.
- Light-cure.
- Inject provisional material into the shell (i.e. Luxatemp).
- Seat the shell onto prep.
- Smooth excess material on the outer surface.
- After the reline material sets, remove from the mouth and trim excess flash. There may be discrepancies in marginal integrity at the completion of this step.
- Complete general contouring.
- Reline the margins.
- Apply adhesive on the internal margin of the provisional, extending onto the outer aspect by 1–2 mm.
- Dry preps and apply a small bead of flowable (Revolution) directly on the tooth preparation margin.
- Seat the provisional.
- Smooth the excess on the outer surface of the provisional to minimize trimming.
- Trim and polish.
- Cement the final provisional restoration.
By following this clinical sequence, provisional restorations fabricated with this technique can accurately transfer details incorporated into the wax-up for precise trial therapy..
FOUNDATIONS MEMBERSHIP
New Dentist?
This Program Is Just for You!
Spear’s Foundations membership is specifically for dentists in their first 0–5 years of practice. For less than you charge for one crown, get a full year of training that applies to your daily work, including guidance from trusted faculty and support from a community of peers — all for only $599 a year.

By: Robert Winter
Date: July 2, 2013
Featured Digest articles
Insights and advice from Spear Faculty and industry experts


