- Article
- Implants
Custom Healing Abutments: A Proven Tool in Implant Cases
Farhad Boltchi
•
September 8, 2026
How custom healing abutments and socket-sealing abutments help shape peri-implant soft tissue from the moment of implant placement
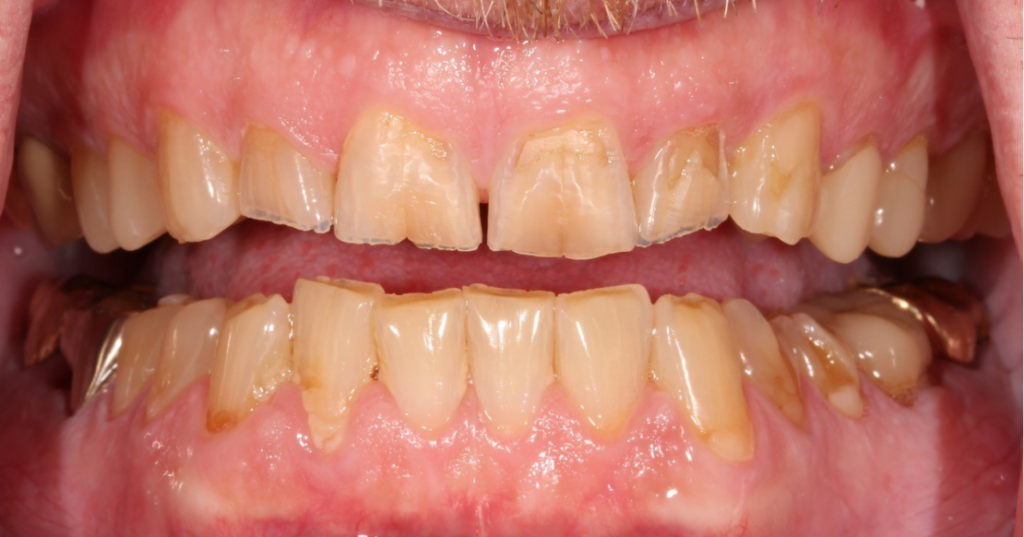
Six weeks after an immediate molar implant, a dentist removes the standard round healing abutment, expecting a clean, developing gum contour underneath. Instead, the papilla between the implant and the adjacent tooth has already started to collapse, and the emergence profile looks nothing like the tooth it replaced. Correcting it now means reshaping the tissue with a provisional restoration: more chair time, and more months before the case is ready for a final crown.
That gap between placement and a predictable outcome are exactly what custom healing abutments are built to close. Custom healing abutments are a healing component, shaped chairside or milled through CAD/CAM, that replicates the natural cervical contour of an extracted tooth so it can shape and support the surrounding gum tissue while it heals.
In contemporary implant dentistry, success is no longer defined by osseointegration alone. Preserving and sculpting peri-implant soft tissue contours, particularly in the esthetic zone, has become just as critical.
As clinicians shift toward minimally invasive, prosthetically driven workflows, custom tissue formers and socket-sealing abutments (SSAs) have emerged as valuable tools for guiding soft-tissue healing from the moment of implant placement.
This Spear Digest article reviews the rationale, clinical application, and current evidence behind these approaches, with a focus on practical integration of custom healing abutments into everyday practice.
Why do soft tissue contours matter after implant placement?
Following tooth extraction, the alveolar ridge undergoes rapid dimensional changes, especially on the buccal aspect. This remodeling often results in lost soft-tissue volume, flattened gingival architecture, and compromised emergence profiles.
Traditional round healing abutments do little to counteract this process. Their generic shape fails to support the peri-implant tissues in ways that mimic natural tooth contours, often leading to additional prosthetic manipulation later.
Custom healing abutments and SSAs address this limitation by shaping the peri-implant mucosa during healing, effectively programming the soft-tissue architecture before the final restoration is even fabricated.
What are custom healing abutments?
Custom healing abutments, also called custom tissue formers, are designed to replicate the cervical and subgingival contours of the extracted tooth. They can be fabricated chairside using composite or digitally through CAD/CAM workflows using materials such as PEEK or zirconia.
Clinical advantages
The primary benefit of this approach is control. By placing a customized contour at the time of surgery, clinicians can:
- Maintain soft-tissue volume and gingival architecture
- Support papillae and prevent interproximal collapse
- Develop a natural emergence profile from the outset
- Reduce the need for repeated abutment disconnection
This is particularly useful in immediate implant placement, where the peri-implant tissues are most vulnerable to collapse.
Emerging evidence suggests that these custom healing abutments improve esthetic outcomes and patient satisfaction compared with standard healing abutments. They also demonstrate comparable implant survival rates and peri-implant tissue stability.
Clinical insight
One of the most practical advantages of custom healing abutments is the reduction in prosthetic guesswork. Instead of shaping tissue later with provisional restorations, the clinician begins with the end in mind, placing a contour that closely approximates the final crown form.
This reflects Spear’s core philosophy that Great Dentistry is a way of seeing. Instead of reacting to tissue collapse after the fact, the clinician sees the final restoration first and builds the case backward from that outcome, starting at the moment of extraction rather than months later at the delivery appointment.
What is a socket-sealing abutment?
A socket-sealing abutment (SSA) is a specific application of custom healing abutments, used primarily in immediate implant placement. Its purpose is twofold: to seal the extraction socket without raising a flap and to support and shape the soft tissue during healing.
This is especially valuable in posterior sites or cases where primary closure is difficult or undesirable.
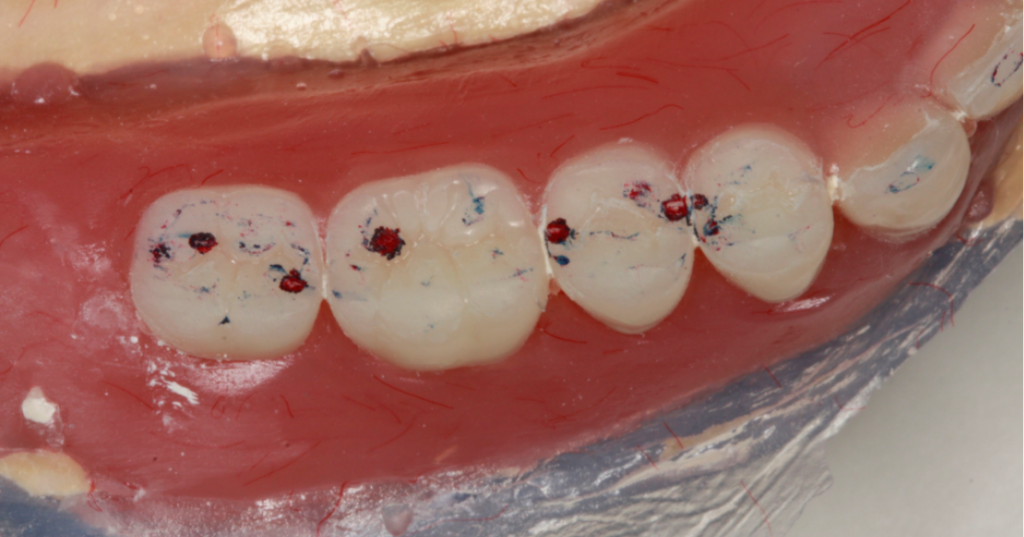
Case 1 shows this in practice. An immediate molar implant sealed and shaped with a chairside custom healing abutment, from placement through the final restoration.
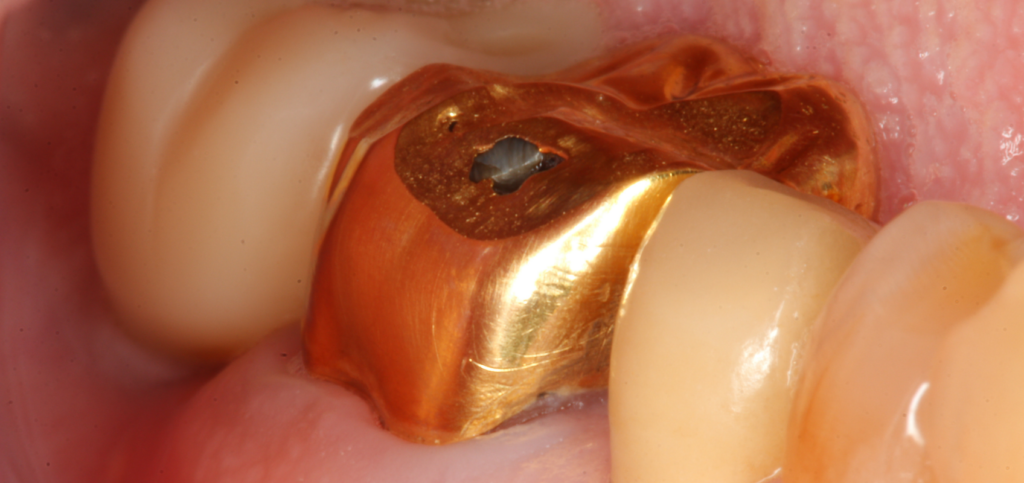
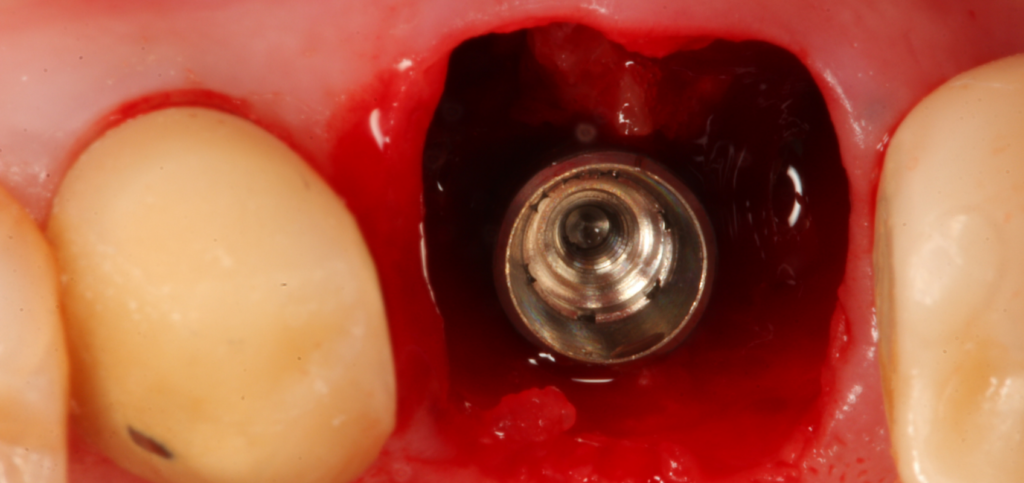
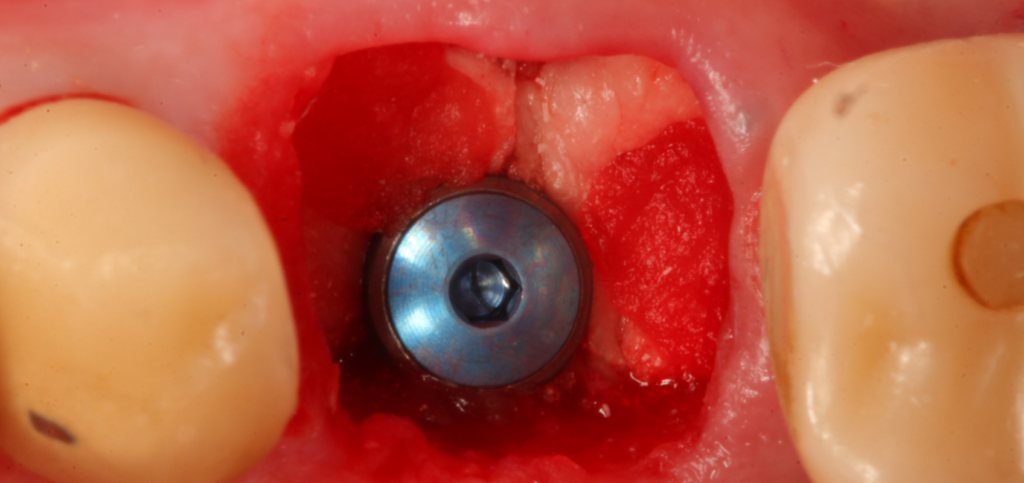
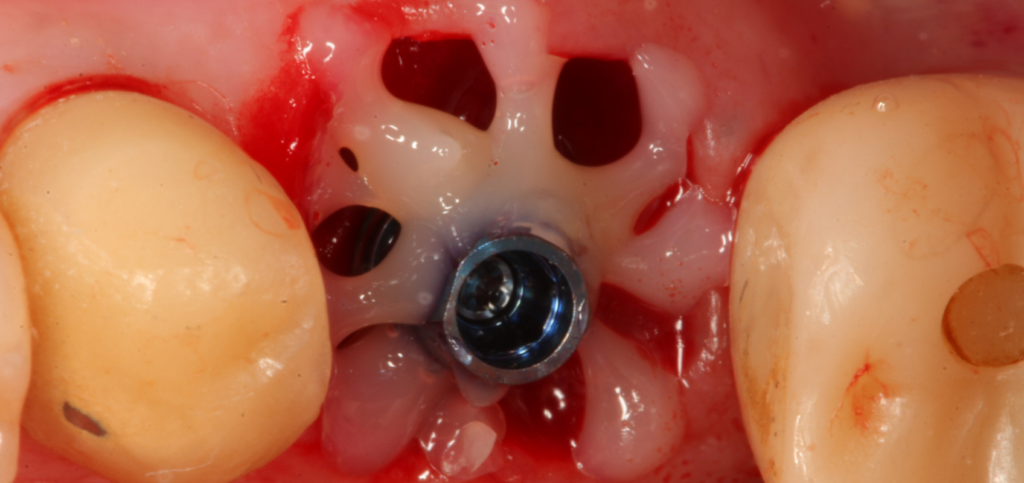
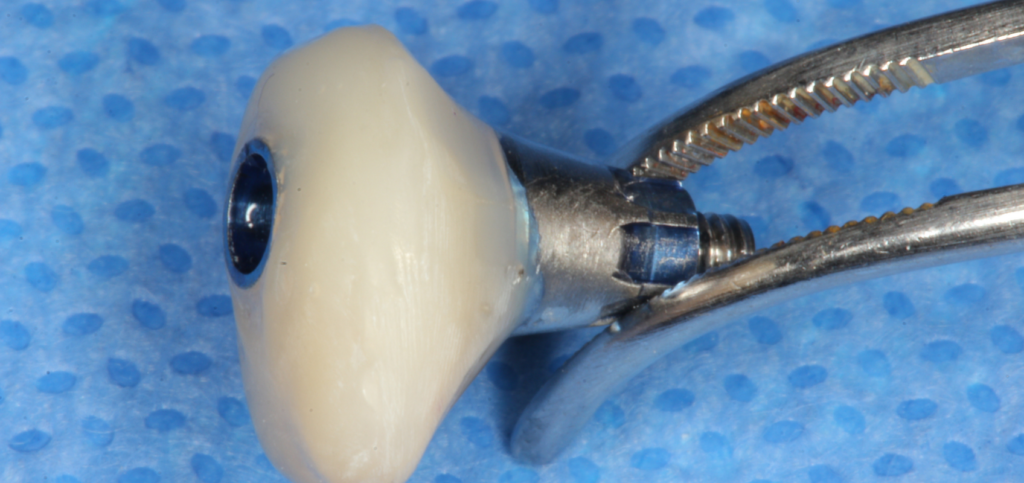
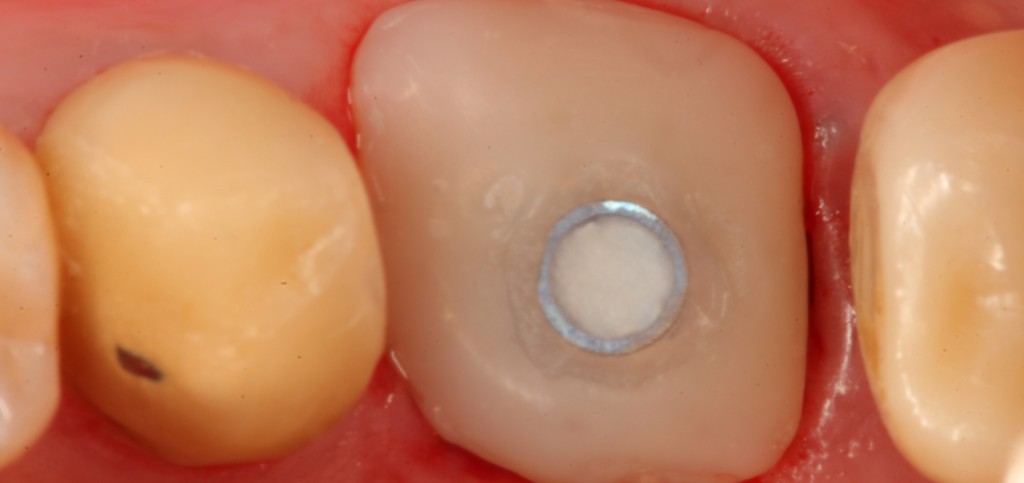
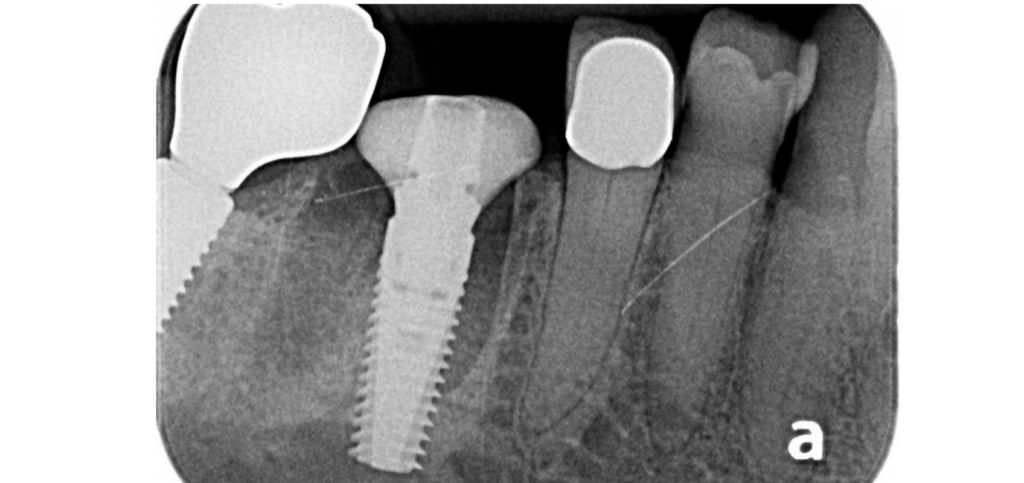
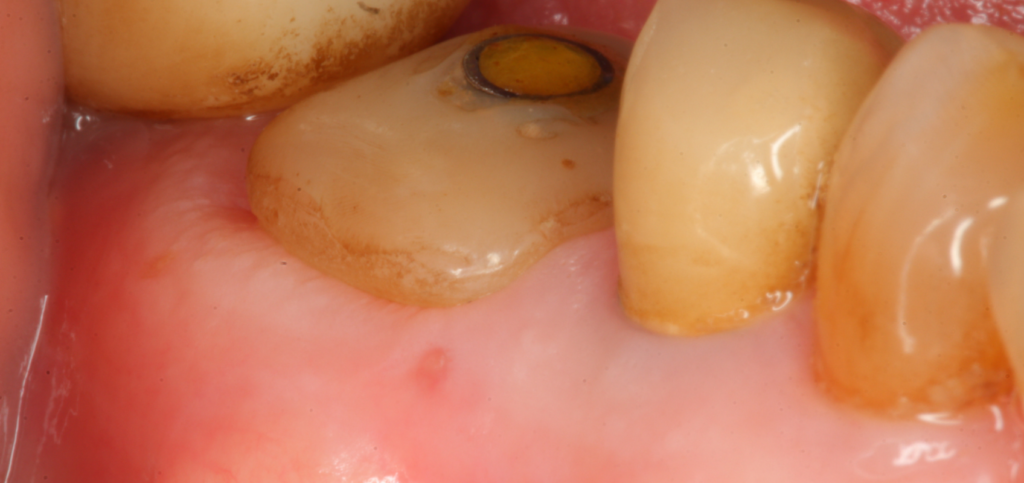
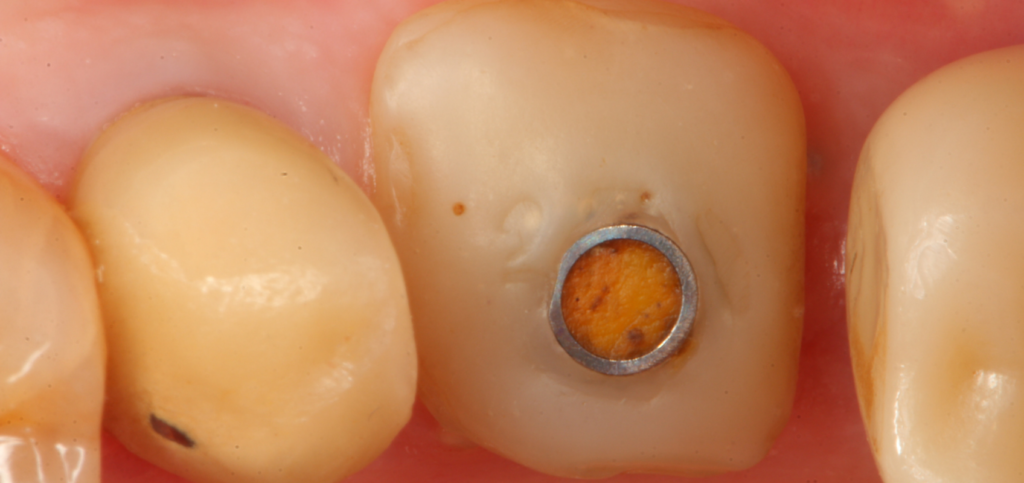
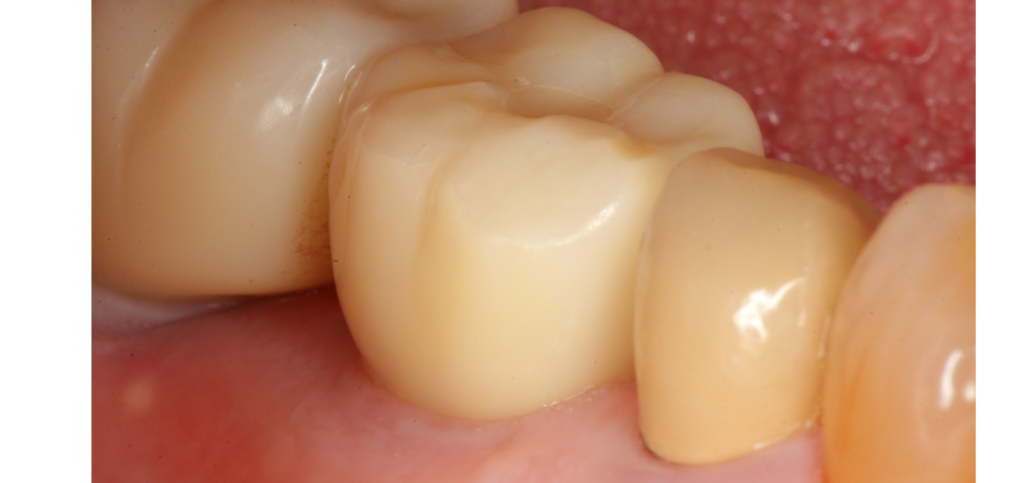
The result: a socket sealed without a flap, tissue shaped from day one, and a final restoration that needed no additional contouring. That combination is what makes socket-sealing abutments worth the extra chair time.
Key benefits
- Flapless healing: preserves blood supply and reduces morbidity
- Clot and graft protection: stabilizes the healing environment
- Tissue contour maintenance: prevents collapse of the peri-implant mucosa
CAD/CAM-fabricated SSAs take this concept further by precisely matching the anatomy of the extracted tooth. Clinical trials have shown improved soft-tissue profiles and higher patient satisfaction compared with conventional healing abutments.
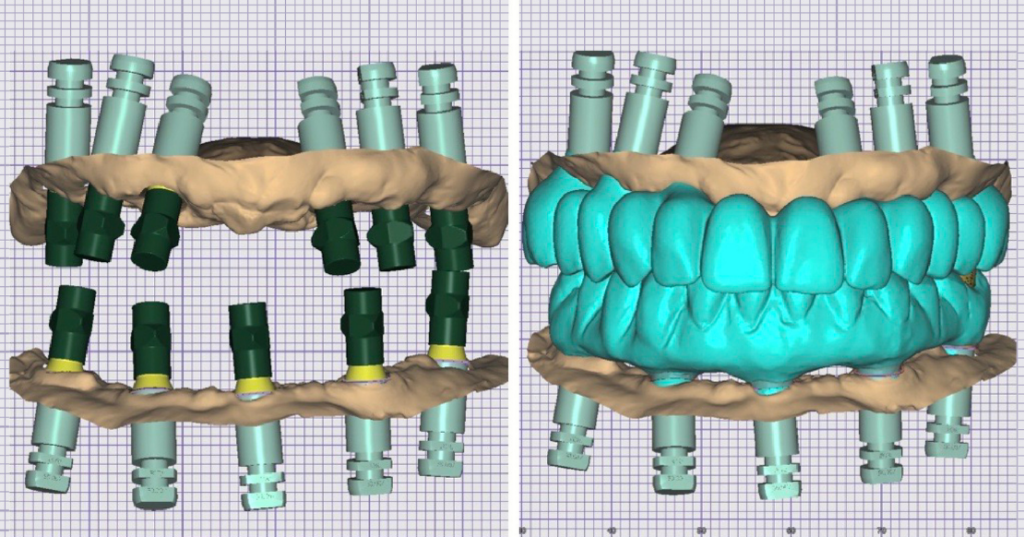
Case 2 puts that precision to work in the esthetic zone: an immediate implant sealed and shaped with a CAD/CAM fabricated socket-sealing abutment, where even small contour errors are visible.
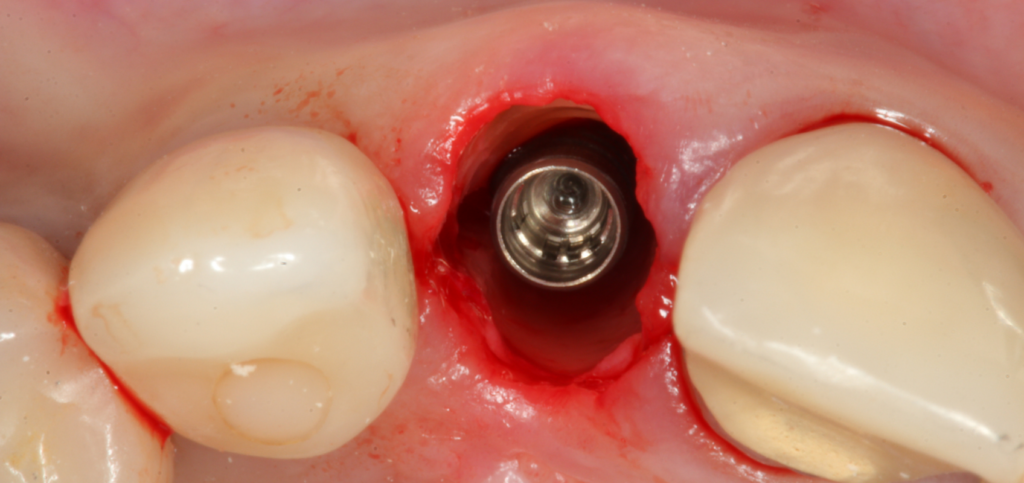
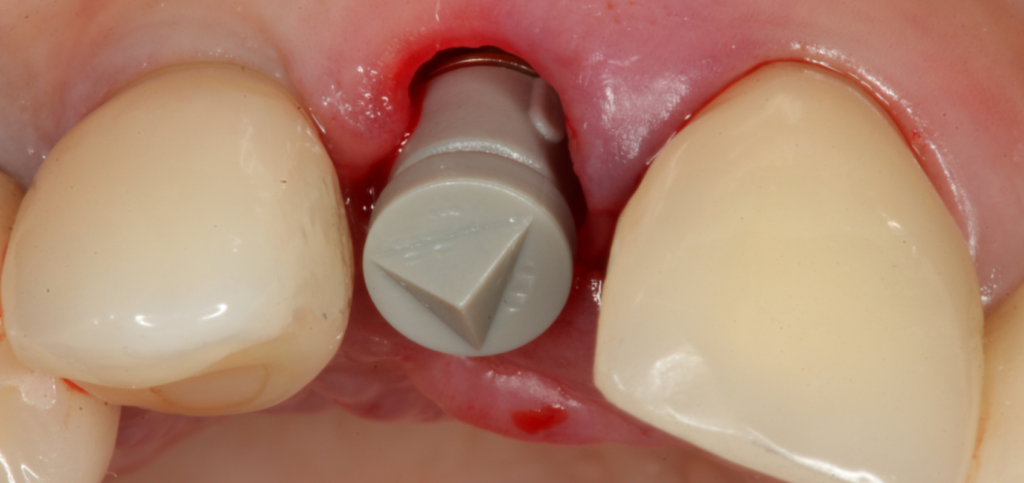
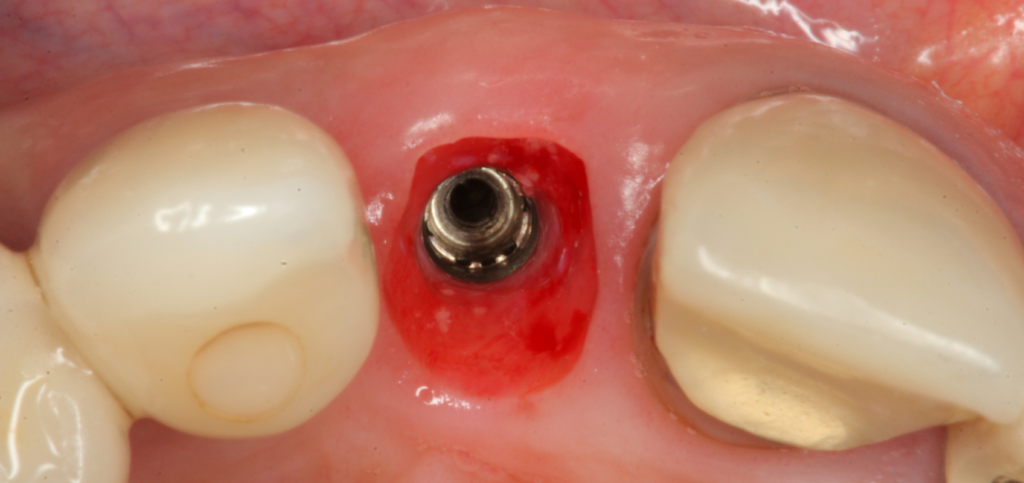
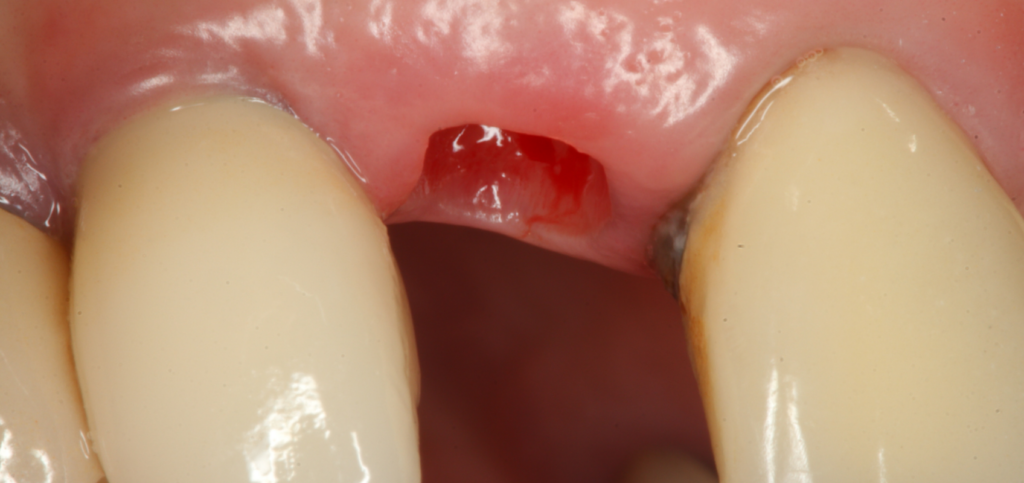
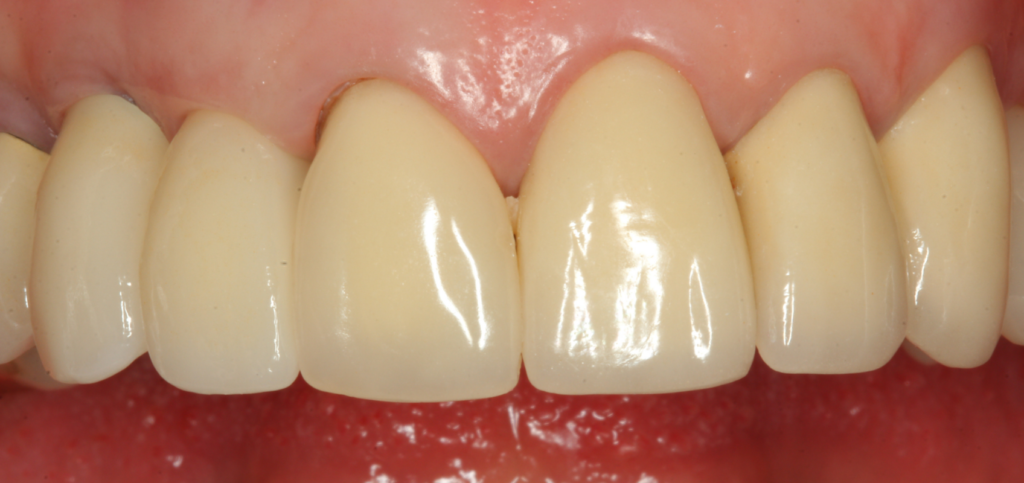
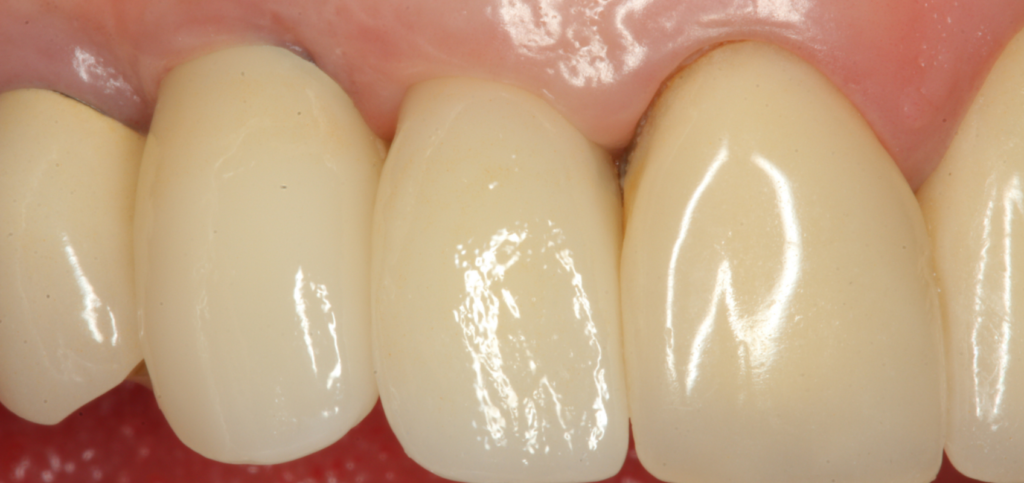
Two different fabrication methods, chairside and CAD/CAM, work through the same underlying mechanisms. Here’s what’s actually happening biologically and mechanically when either one is in place.
How do custom healing abutments and SSAs work?
Both approaches work through similar biological and mechanical principles:
- Emergence profile guidance: they replicate the natural cervical contour of the tooth, guiding soft-tissue healing into a more anatomical form.
- Mechanical support: by occupying the cervical space, they prevent soft-tissue collapse during the critical early healing phase.
- Socket sealing: they act as a barrier, protecting the clot and underlying graft material from contamination and disruption.
- Minimally invasive healing: flapless approaches preserve periosteal blood supply, which is essential for maintaining both hard and soft-tissue volume.
How do you integrate custom healing abutments into your workflow?
For clinicians considering incorporating these techniques, the workflow can be straightforward:
- Perform an atraumatic extraction.
- Place the implant in a prosthetically driven position.
- Capture the socket anatomy, using an analog or digital scan.
- Fabricate the custom abutment, chairside or through CAD/CAM.
- Place the abutment immediately to seal and shape the tissue.
Material considerations
- PEEK: easy to mill, with a favorable soft tissue response
- Zirconia: excellent esthetics, especially in anterior regions
- Composite: convenient for chairside customization, though less durable
For a closer look at custom healing abutments and how to weigh techniques against the alternatives, the Spear Online course Treatment Options for Maintaining Tissue Support During Immediate Implant Placement walks through this decision-making process in greater depth.
For a step-by-step chairside fabrication technique, including provisional handling and material tips, see Tips on Fabricating Implant Provisionals and Custom Healing Abutments.
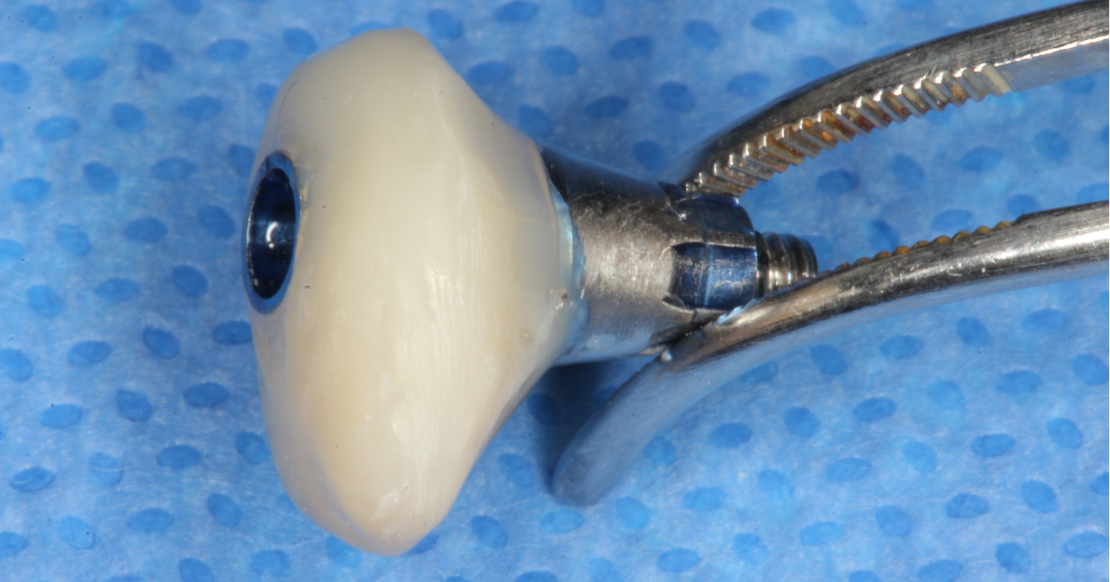
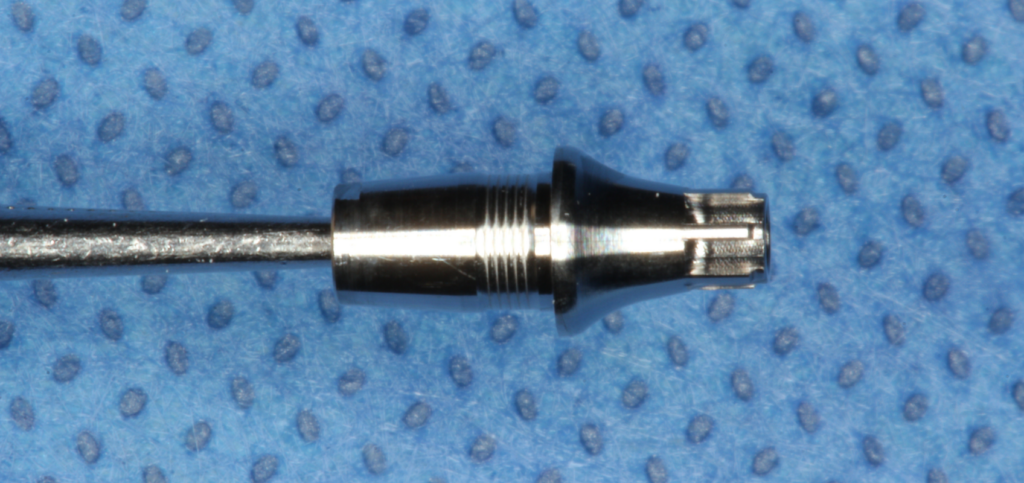
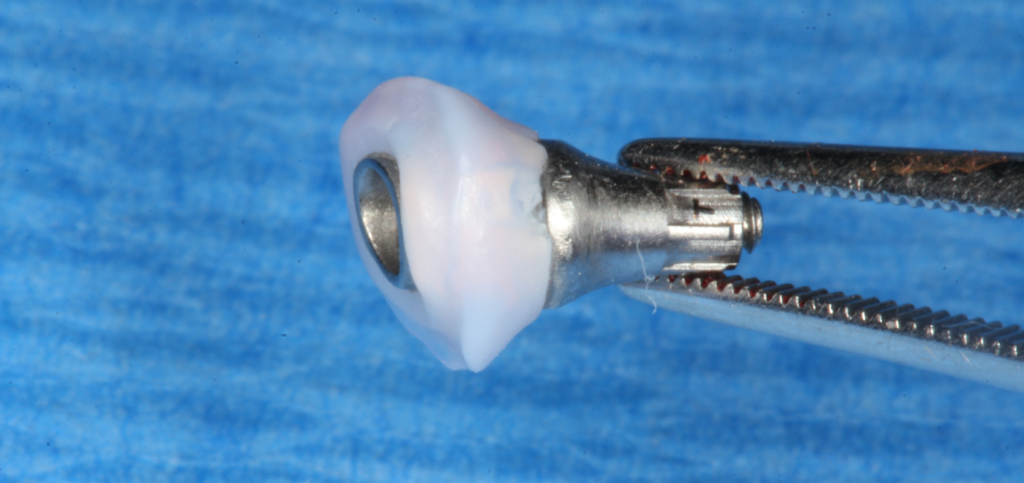
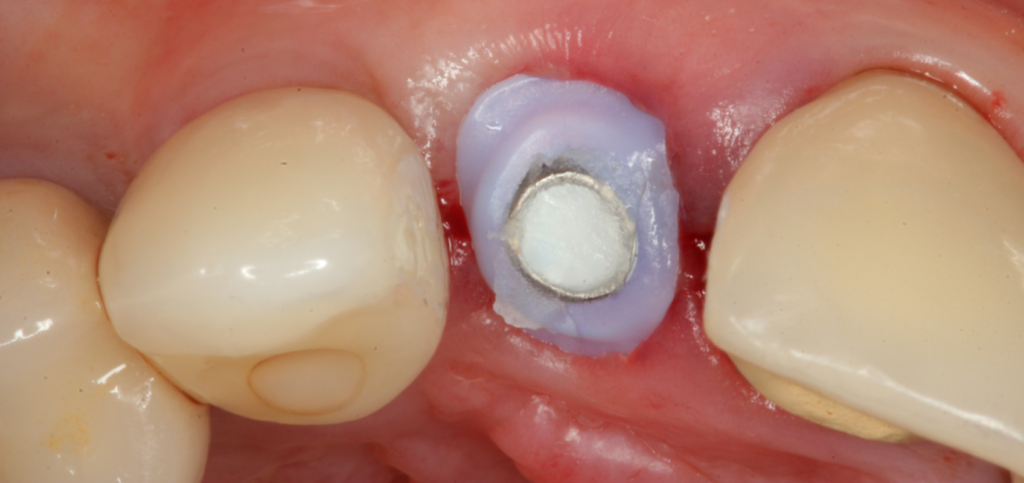
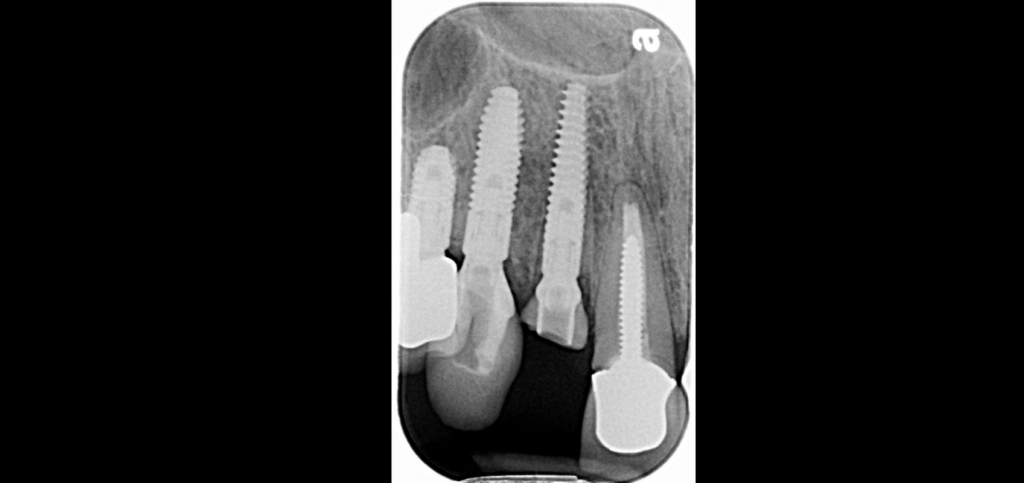
Not every case calls for immediate placement. Case 3 shows a delayed protocol: a titanium Atlantis custom tissue former, milled through CAD/CAM, placed in the esthetic zone after the extraction site had already healed.
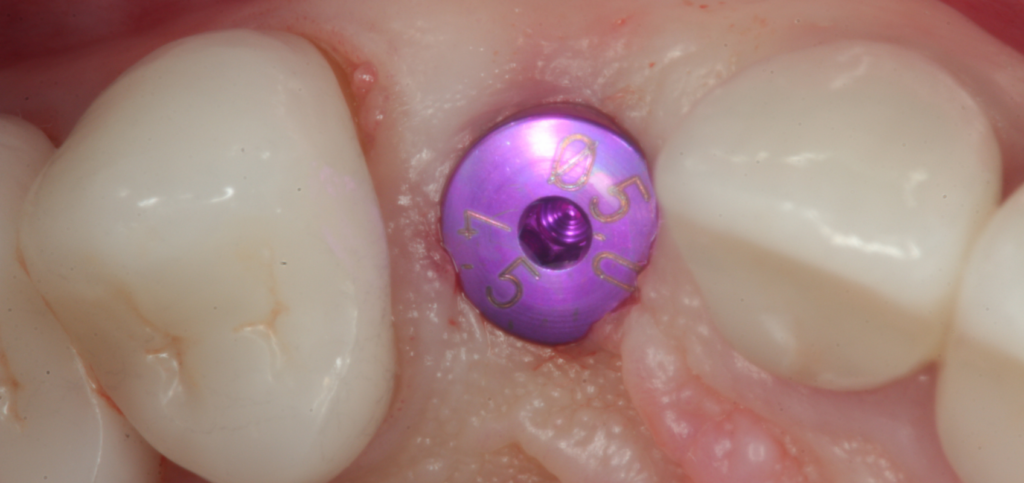
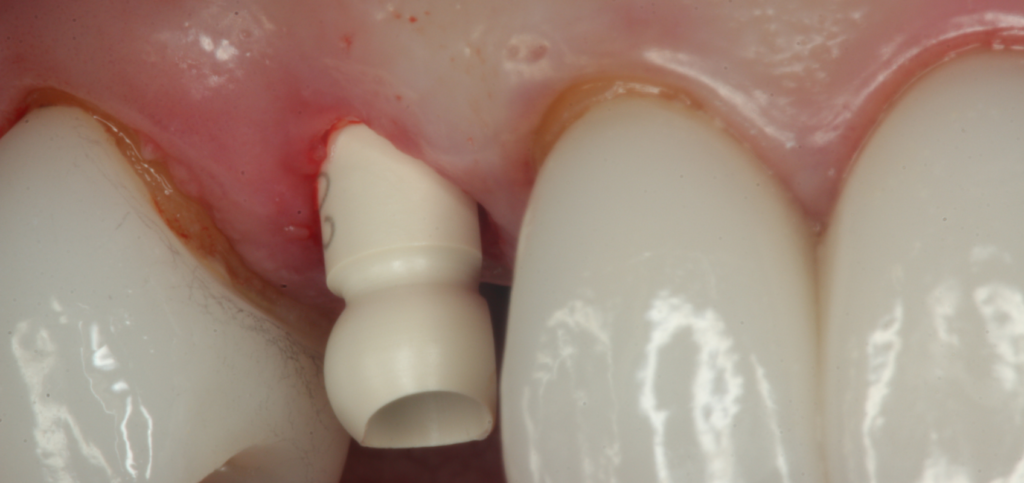
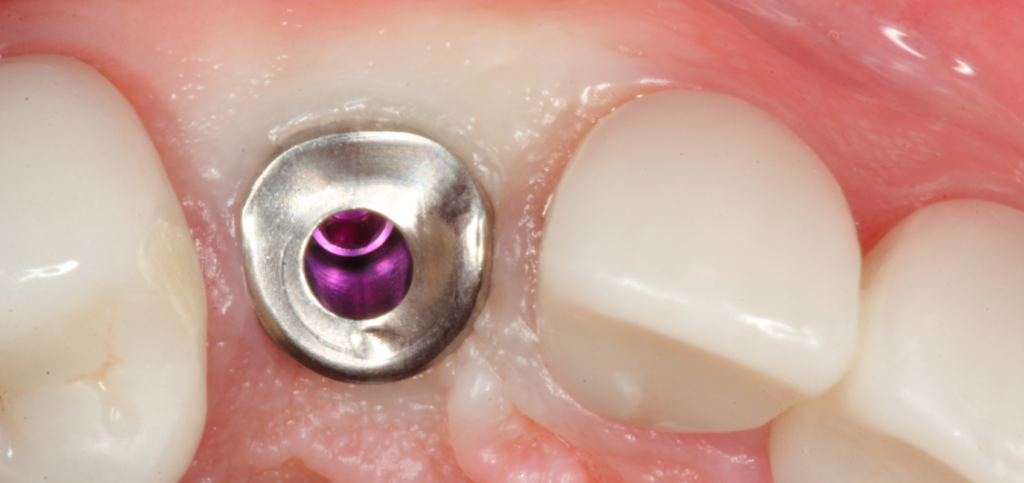
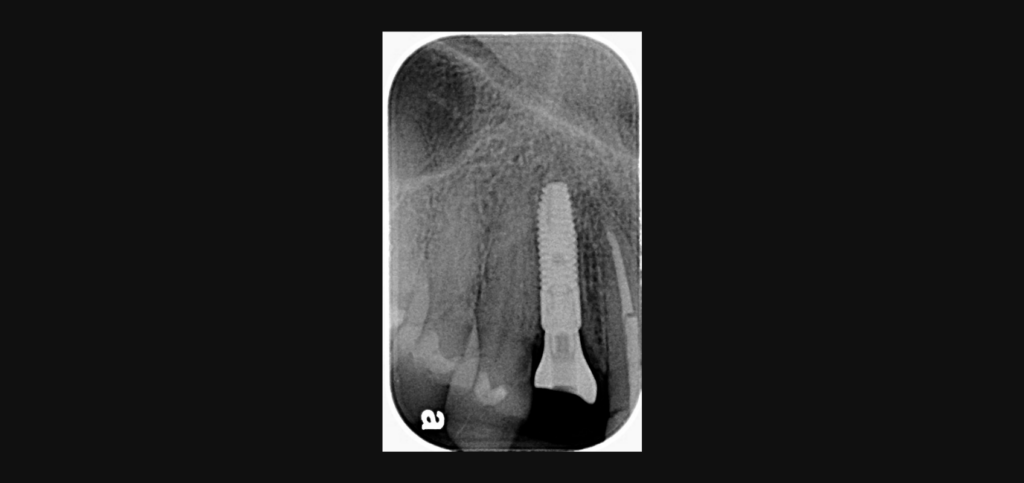
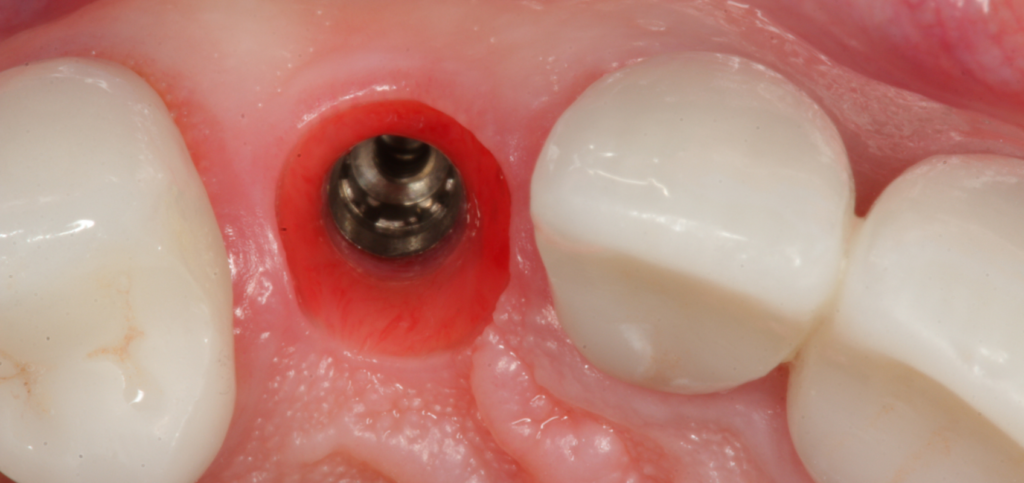
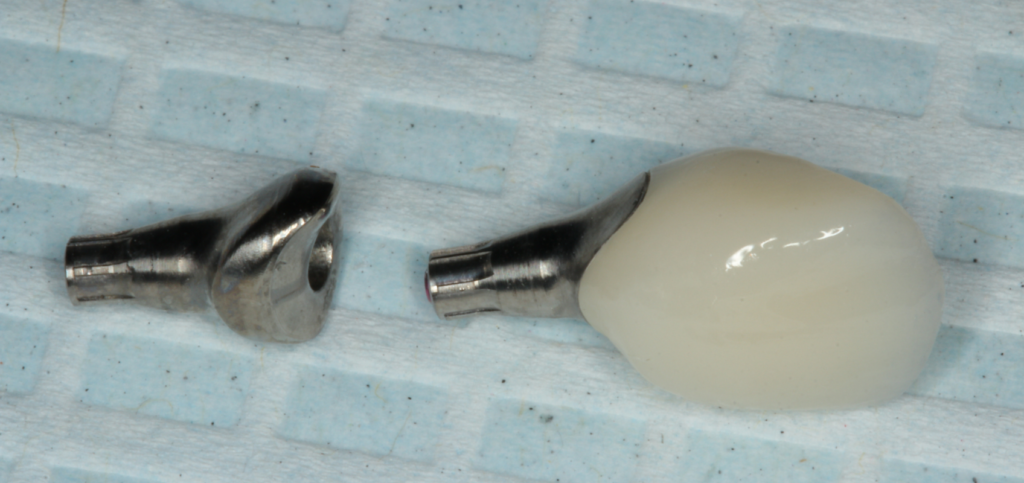
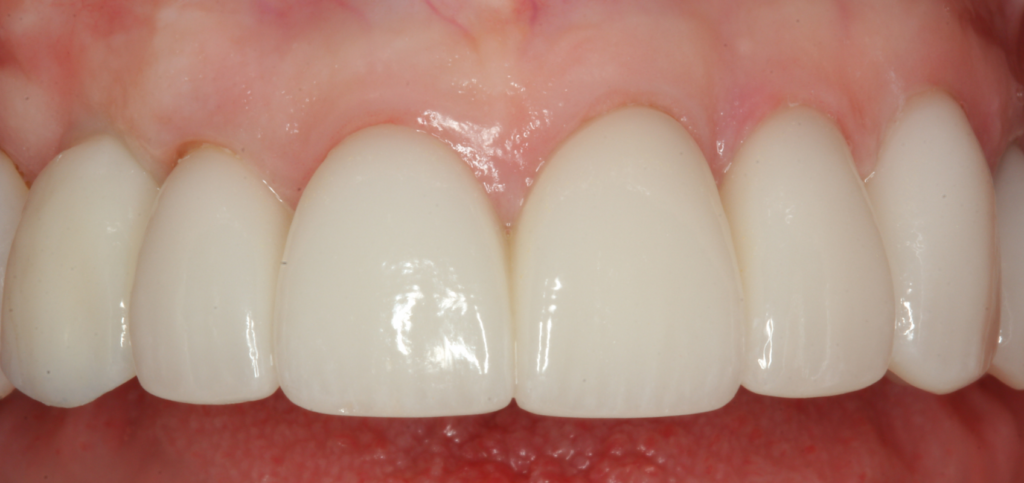
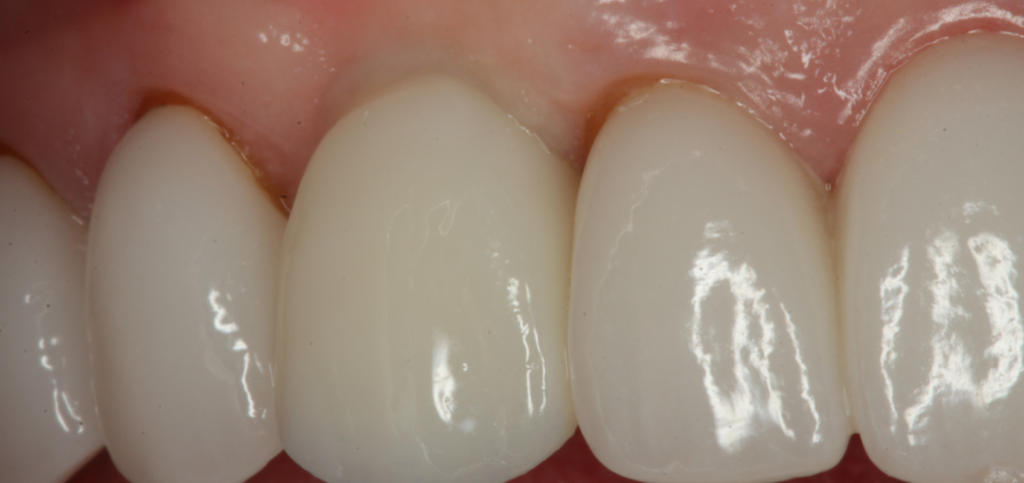
Whether placed immediately or after the site has healed, the same principle holds: the closer the contour matches the natural tooth, the less correction the final restoration needs.
How do custom healing abutments compare to standard abutments?
Standard healing abutments are simple and cost-effective, but they come with limitations:
- Their cylindrical shape does not support natural tissue contours.
- They often require additional soft-tissue sculpting with provisionals.
- They may contribute to flattened emergence profiles.
Custom abutments, by contrast, offer a more proactive strategy: they shape tissue early rather than correcting it later.
That said, it’s important to remain evidence-based. While soft-tissue outcomes and esthetics appear improved, the current literature does not consistently demonstrate significant differences in marginal bone loss between custom healing abutments and conventional abutments.
What are the limitations of custom healing abutments and SSAs?
Despite their advantages, these techniques are not without challenges:
- Increased chairside or laboratory time
- Technique sensitivity
- Additional cost, particularly with CAD/CAM workflows
- Limited long-term data in large-scale randomized trials
Case selection is also critical. Thin biotypes, high esthetic demand, and immediate implant placement scenarios are situations in which these techniques tend to provide the greatest benefit.
Key takeaways for clinical practice
Custom healing abutments and socket-sealing abutments represent a shift toward proactive soft-tissue management in implant dentistry. Rather than reacting to tissue collapse, clinicians can guide and preserve peri-implant contours from day one.
For Spear-trained clinicians focused on interdisciplinary, outcome-driven care, the key insights are:
- Start with the desired emergence profile and work backward.
- Use a custom tissue former or SSA to stabilize and shape tissue early.
- Consider SSAs in immediate implant cases to simplify healing.
- Balance the benefits against cost, time, and clinical complexity.
Bottom line
Go back to that molar case from the opening. A collapsed papilla and a flattened emergence profile are not inevitable. They are often the result of a standard, one-size-fits-all healing abutment doing nothing to guide the tissue during the weeks that matter most.
Custom healing abutments and socket-sealing abutments give clinicians a way to prevent that outcome rather than repair it later: preserving contour, reducing chairside revisions, and improving esthetic predictability from the day of placement.
As digital dentistry continues to evolve, custom healing abutments will only become more accessible and more central to predictable implant esthetics. Clinicians who want hands-on practice building and placing them can develop that skill at Spear’s Implant Restorative Dentistry Workshop, where seeing the finished case before the first incision is the standard, not the exception.
Frequently Asked Questions
SPEAR campus Workshops
Learn Hands-on From Faculty Who Still Practice
A few days at Spear Campus can change how you diagnose, plan, and present cases, not through more lectures, but through hands-on training led by faculty who treat patients every week. Work through real cases in small groups and leave with techniques you can use on your next patient.
Featured Digest articles
Insights and advice from Spear Faculty and industry experts