Managing Diastemas With Veneers
Diastema closure can be a challenging restorative process. The key to success is proper treatment planning and creating a vision of the desired outcome. This “outcome-based” design provides the guidance needed to create esthetic, cleansable and long-lasting restorations.
When a patient desires to close a diastema, it is essential first to apply the treatment planning concepts of Facially Generated Treatment Planning (FGTP) to guide the proposed restorative process. Using FGTP templates, the tooth contours may be evaluated to determine the correct tooth proportion for closing the interproximal space. From these templates, a diagnostic wax-up may be created to provide guidance for tooth preparation finish lines and margins. The placement of these lines is critical to the longevity and maintainability of the restorations.
A general “rule of thumb” exists for finish line positions when closing open contact situations. Generally, for teeth ideally positioned within the dental arches, the contact point between the anterior teeth is positioned directly under the peak of the gingival papilla. This positioning allows for adequate facial, incisal, and gingival embrasure form of the teeth. The restorative dentist must correctly position the restoration’s finishing lines to close open contact situations.
The rule of thumb suggests that if there is one millimeter between the teeth roots, the veneer’s lingual finish line should be one millimeter palatal to the papilla (or contact point). If two millimeters exist between the roots, the finish line should be two millimeters (minimum) palatal to the contact. If three millimeters are between the roots, the new contact should be positioned three millimeters to the lingual. Beyond that, orthodontics or tooth movement should be considered a tool for closing contacts.
Suppose the lingual finishing line is positioned too facially. In that case, there is a risk that the final veneer ceramic will have a “wing” of unsupported ceramic, which will create an interproximal “ledge” that will be impossible to floss and clean adequately. This rule of thumb is a guide for achieving predictable results. Applying these concepts to a case may make it easier to visualize the end goal.

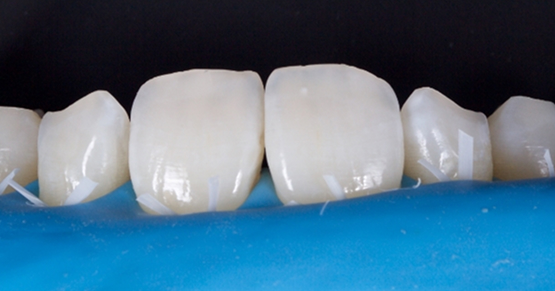
Dick C. presented to my practice with a desire to close his maxillary anterior diastema. No medical complications existed to limit his treatment. He was not interested in pursuing orthodontics.

FGTP templates were utilized to guide the patient conversation and treatment planning. It was decided to utilize two anterior veneers to achieve the desired result.

The papilla between the adjacent central incisors was identified using the rule of thumb as a guide. The incisal edges of the proposed veneers are determined, and a line is extended from the distal aspect of each central incisor. This line aids in visualizing the contact points between the tooth surfaces. The image provided outlines an approximation of the veneer tooth preparations. The margins are identified according to the rule of thumb.
The dimension of the midline diastema is approximately 1.0 mm. This infers that the midline root proximity is 2.0 mm. The rule of thumb guideline requires that the veneer margin be placed 2.0 mm palatal to the midline papilla. The distal contacts of the proposed veneers will remain in their existing positions. Therefore, the distal margins will be placed 1.0 mm palatal to the contact point.

An image of the final veneer preparations shows the actual placement of the interproximal finishing lines. The midline finish lines are 2.0 mm lingual to the contact point. The distal margins were placed one millimeter palatal to the contact. These margin placements allow for them to be cleansed and to allow for adequate ceramic thickness.

The ceramic veneers on the models clearly show the placement differences between the mesial and distal finished margins. Placing the margins with the proper palatal extension allows for a smooth transition line from natural tooth structure to the ceramic veneer, which allows for adequate and successful home care.

These finished restorations have properly closed the patient’s midline diastema. Dick C. is very pleased with the results. The margin placement has allowed for healthy tissue and ideal papilla form. Applying the rule of thumb concepts to margin placement helps to create predictable and long-lasting restorative results. The process begins with “outcome-based” design and planning. Knowing where we want to go from the beginning makes it possible to execute the process with precision and predictability.
SPEAR campus
Hands-On Learning in Spear Workshops
With enhanced safety and sterilization measures in place, the Spear Campus is now reopened for hands-on clinical CE workshops. As you consider a trip to Scottsdale, please visit our campus page for more details, including information on instructors, CE curricula and dates that will work for your schedule.

By: Jeffrey Bonk
Date: March 14, 2022
Featured Digest articles
Insights and advice from Spear Faculty and industry experts


