- Article
- |
- Implants
Laser to Remove a Cemented Crown on an Implant Abutment?
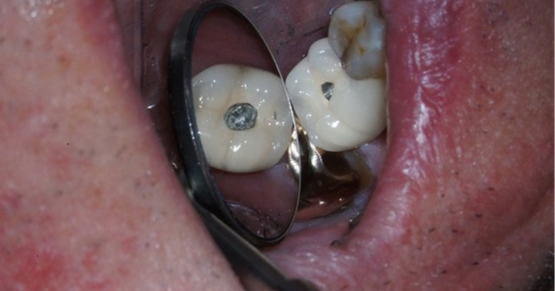
Many dentists search for a laser to remove a cemented crown on an implant abutment, but a soft-tissue laser is not designed to cut through crown material. Instead, successful treatment depends on understanding when to use a laser for implant tissue management and when to use restorative techniques to safely access the abutment screw.
As dental implant therapy becomes more common, dentists are increasingly faced with complications involving implant restorations.
Clinicians must determine whether the complication involves overgrown tissue, a loose abutment screw, a failed restoration, or a combination of factors before selecting the appropriate treatment approach.
Two of the most frequent challenges are managing soft tissue that has grown over an implant cover screw and determining the safest way to remove a cemented crown on an implant abutment when the restoration becomes loose or fails.
This article explains when a laser can help simplify implant treatment, how laser-assisted implant uncovery works, and the step-by-step process for managing a cement-retained implant crown without damaging the implant body or its internal components.
Why use a laser around dental implants?
Traditional implant uncovering uses a scalpel blade or tissue punch to incise the soft tissue and expose the cover screw. This approach can cause postoperative discomfort and bleeding. Electrosurgery is a common alternative because it cauterizes tissue and reduces bleeding, but it carries a risk of elevating the temperature around the implant, which can lead to bone loss.
A laser addresses both drawbacks. It’s well-suited for soft-tissue crown lengthening, troughing, gingivectomy, and esthetic recontouring.
For implant uncovery and tissue modification around implants, the laser produces little to no bleeding and significantly reduces post-operative pain.
Importantly, when using a laser for uncovery, the impression can often be taken immediately after the procedure, eliminating the need for an additional appointment.
How do you perform laser-assisted implant uncovery?
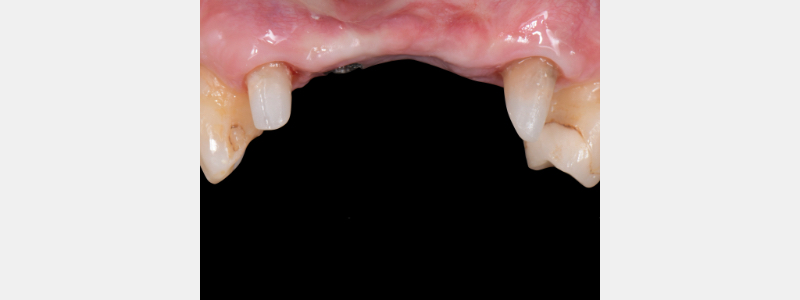
The following technique, developed by Spear Resident Faculty Dr. Ricardo Mitrani, demonstrates laser-assisted uncovery for implants placed in the #8 and #10 positions, with crowns prepared on #7 and #11.
What equipment is needed for laser-assisted implant uncovery?
Equipment used: Waterlase laser with an MZ6 tip
Step 1: Confirm Implant Position
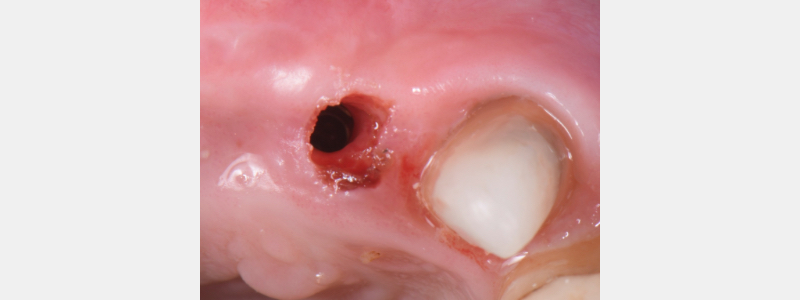
Take an occlusal and frontal view of the patient. In this case, the implant on #8 had already been uncovered, and a healing abutment was in place, while the implant on #10 still required uncovery.
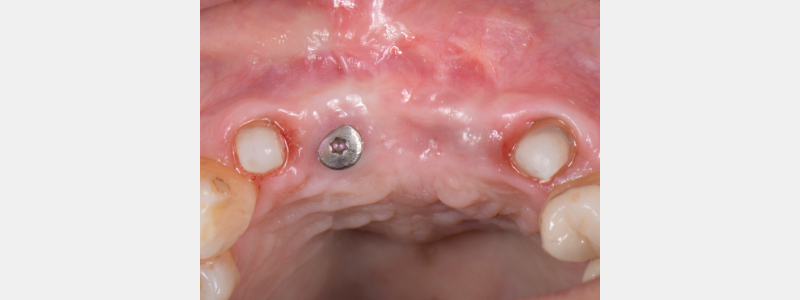
Step 2: Mark the Implant Location
Use a surgical guide to mark the implant site, allowing the overlying soft tissue to be precisely targeted.
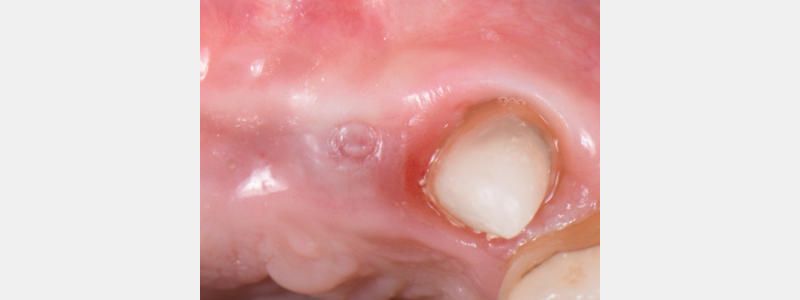
Step 3: Laser Tissue Removal
With the MZ6 tip, the laser precisely removes only the soft tissue directly above the implant, exposing the cover screw or healing abutment. No sutures are needed, and bleeding is minimal.
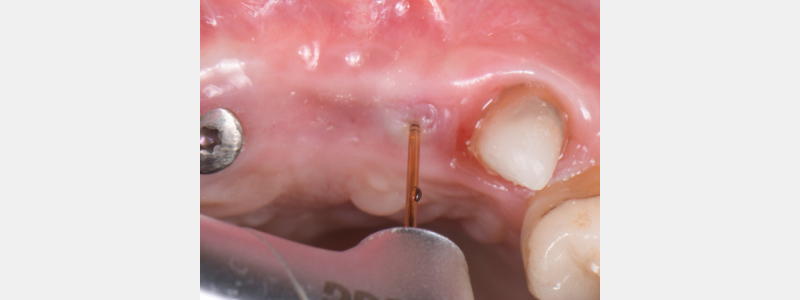
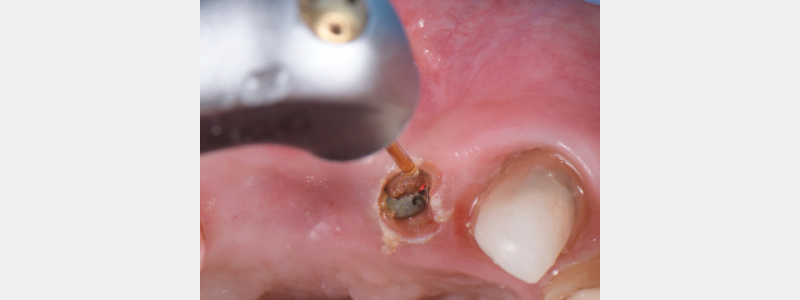
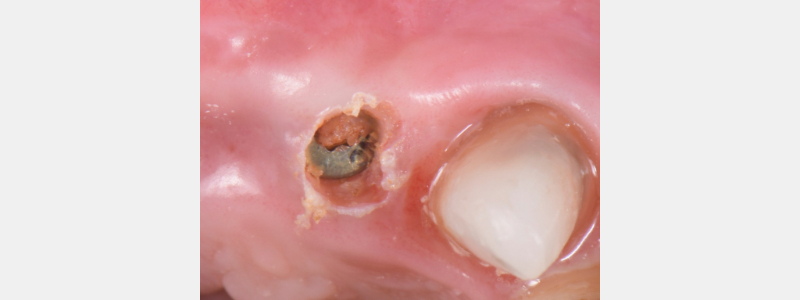
Step 4: Remove the Healing Abutment and Take Impressions
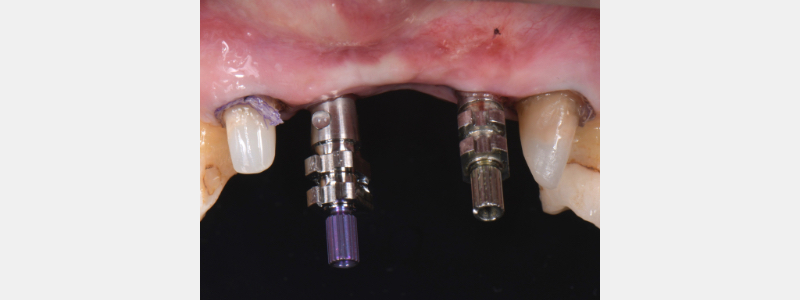
After the soft tissue is removed and the cover screw is exposed, the healing abutment is removed. Impression copings can be placed immediately following uncovery to capture the provisional impression in the same appointment.
Step 5: Seat the Provisional Restoration
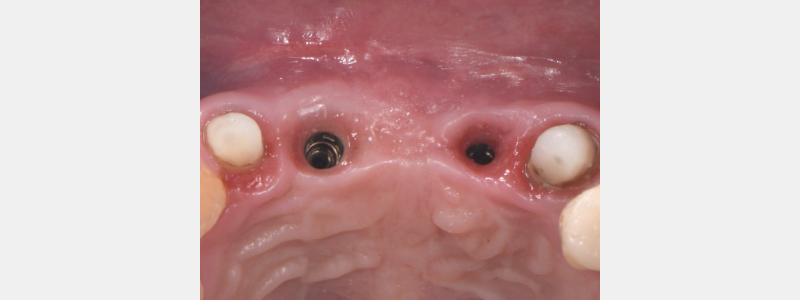
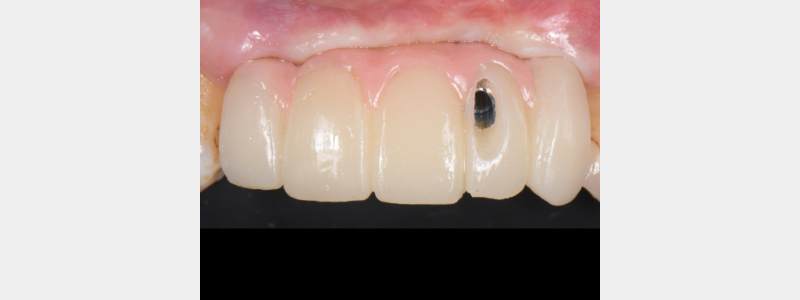
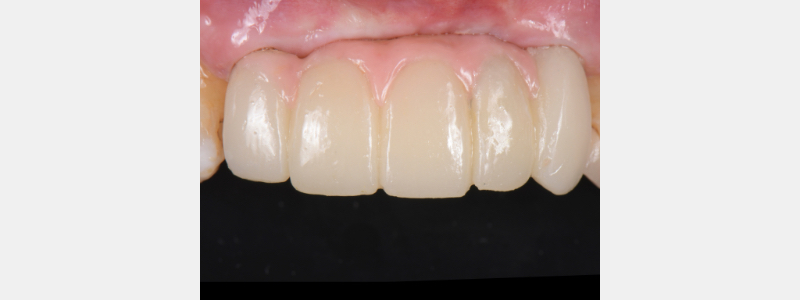
The postoperative occlusal view at seven days shows clean, healing tissue. The provisional implant-supported restoration is seated, and the access screw is filled with composite.
Can a laser remove a cemented crown on an implant abutment, or is another technique required?
No. A soft-tissue dental laser is not designed to cut porcelain, zirconia, or metal crown materials. While a laser is highly effective for implant uncovery and soft-tissue management, the preferred technique for removing a cemented crown on an implant abutment is to access the abutment screw through the restoration whenever possible.
How do you remove a cemented crown on an implant abutment?
Once an implant is restored with a cement-retained crown, removing the restoration requires a different approach than implant uncovery or soft-tissue management.
Dentists searching for a laser to remove a cemented crown on an implant abutment should understand that the preferred technique is typically to access the abutment screw through the crown rather than attempting to cut through the restoration.
When the restoration becomes loose or fails, careful diagnosis is essential to protect both the implant and its internal components.
What should you do before removing a cemented implant crown?
Step 1: Identify the implant system
Before any intervention, confirm which implant system you are working with to ensure the correct components and instrumentation are available. If another clinician placed the implant, obtaining records may be difficult. Many implant manufacturers have technical departments that can identify an implant system from a radiograph. If there is any uncertainty about the implant’s identity, contact the manufacturer before proceeding.
How do you access the abutment screw through a cemented implant crown?
Step 2: Access the abutment screw through the crown
Rather than attempting to tap or pry the crown off the abutment, which risks fracturing the abutment screw or damaging the implant’s internal threads, the preferred approach is to drill through the crown to access the abutment screw directly. Think of this as an endodontic access through restorative material. If the crown is rotating on the implant, the rotation point often indicates the screw’s center, which helps locate the access hole.
Note that while you may place cotton, wax, or Teflon tape over the abutment screw as a matter of habit, a previous clinician may not have done so. Probe carefully with an explorer before drilling to avoid pushing debris into the implant.
Work deliberately and avoid applying excessive force to the screw. Damaging the screw head can make removal significantly more complex, and damaging the implant body itself could result in the loss of the entire implant.
When should you cut off a cemented implant crown?
Step 3: When the crown cannot be saved
If you cannot safely locate the abutment screw and the crown must still be removed, one option is to cut through the mesial and distal of the crown to create a diastema on both sides wide enough to allow the crown to be rotated and lifted off the abutment. This approach destroys the crown and requires fabrication of a new restoration. While not ideal, protecting the implant always takes priority over preserving the restoration.
How do you remove a stuck Ti-Base from an implant?
A complication that can follow crown removal on an implant with a custom abutment is a Ti-Base that will not lift free from the implant body after the screw is removed. This scenario most commonly occurs when a custom abutment is fabricated from a stock Ti-Base with a bonded or cemented zirconia mesostructure. If the bond at the zirconia-to-Ti-Base interface fails, the crown and mesostructure come out together, while the Ti-Base remains behind, still firmly seated in the implant.
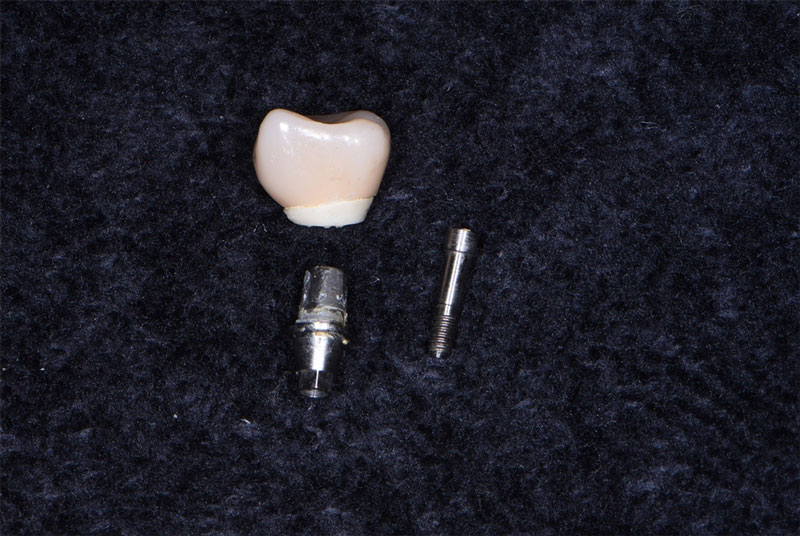
Ti-Bases can become wedged in the implant connection, particularly with Astra and Straumann implants, and sometimes with third-party components. The screw comes out easily, but no amount of pulling with standard instruments will free the Ti-Base.
Can Endo Ice help remove a stuck Ti-Base?
The solution is to use Endo Ice refrigerant spray to chill the Ti-Base, causing the metal to contract slightly and allowing it to be lifted free. The technique is simple but requires patience.
What materials are needed for Ti-Base retrieval?
- Endo Ice refrigerant spray with a small-diameter delivery tube
- Hemostats or similar retrieval instrument
How do you use Endo Ice to retrieve a stuck Ti-Base?
- Attach the small-diameter tube to the Endo Ice can.
- Insert the tip of the tube into the screw access hole of the Ti-Base to direct the spray internally and avoid contact with the surrounding soft tissue. Freezing the tissue can cause a thermal burn injury.
- Apply short, controlled bursts of Endo Ice. Do not apply continuously.
- Between sprays, attempt to lift the Ti-Base with hemostats gently. Do not allow it to fully re-warm between attempts, as cumulative cooling is what achieves the thermal contraction needed.
- After several cycles of cooling and gentle pulling, the Ti-Base should release. Be patient; one or two attempts are rarely sufficient.
Once the Ti-Base is free, inspect the implant connection for damage and thoroughly clean the intalglio surface of the mesostructure before rebonding. If the Ti-Base and mesostructure are both intact, the restored assembly can often serve as a provisional or even a definitive restoration, with the access hole in the crown closed with composite.
What are the key clinical takeaways for laser-assisted implant uncovery and crown removal?
- A laser is the preferred tool for implant uncovery because it minimizes bleeding, reduces post-operative pain, and allows immediate impressioning in the same appointment.
- When a cemented implant crown becomes loose, the most challenging cases involve a loose abutment screw beneath a crown that remains cement-retained. Accessing the screw through the crown is safer than attempting to separate the crown from the abutment by force.
- Always confirm implant identity before treating any implant complication, especially when another clinician placed the implant.
- If a Ti-Base will not release after screw removal, Endo Ice cryotherapy applied in short, controlled bursts through the screw access hole is an effective, non-destructive retrieval method.
- Protecting the implant body and its internal threads is always the top priority. A crown can be replaced; a damaged implant cannot.
Mastering implant complications starts with the right clinical training
Knowing when to use a laser and when to rely on other techniques is essential for successfully managing implant complications.
While many clinicians search for a laser to remove a cemented crown on an implant abutment, lasers are primarily used for implant uncovery and soft-tissue management. Successful treatment of a loose cement-retained implant crown requires careful diagnosis, proper access to the abutment screw, and techniques that protect the implant and its internal components.
Equally important is understanding how to safely access abutment screws, retrieve stuck components, and protect the implant in the event of restoration complications. These situations require more than technical skill. They require sound clinical judgment based on proven protocols and comprehensive treatment planning.
Through Spear All Access, dentists gain access to in-depth implant education, clinical demonstrations, and expert-led training designed to help them diagnose complications, make confident decisions, and deliver predictable outcomes.
Whether you’re managing a loose implant crown, uncovering an implant, or restoring a complex case, Spear can help you approach every challenge with greater confidence and precision.
Contributing Author
John R. Carson | Clinical technique: loose crown management and Ti-Base retrieval
Frequently Asked Questions
SPEAR All Access
An Integrated System for Practice Growth
Spear All Access is an integrated growth system for dentists who want to build a high-performing practice. Attend any Spear or CDOCS workshop, access all our online courses and chairside tools, and work with a Practice Growth Partner to implement the system.

By: Ricardo Mitrani
Date: February 8, 2021
Featured Digest articles
Insights and advice from Spear Faculty and industry experts