- Article
- Occlusion / Wear
4 Essential Leaf Gauge Dental Techniques Explained
Kevin Kwiecien
•
March 5, 2015
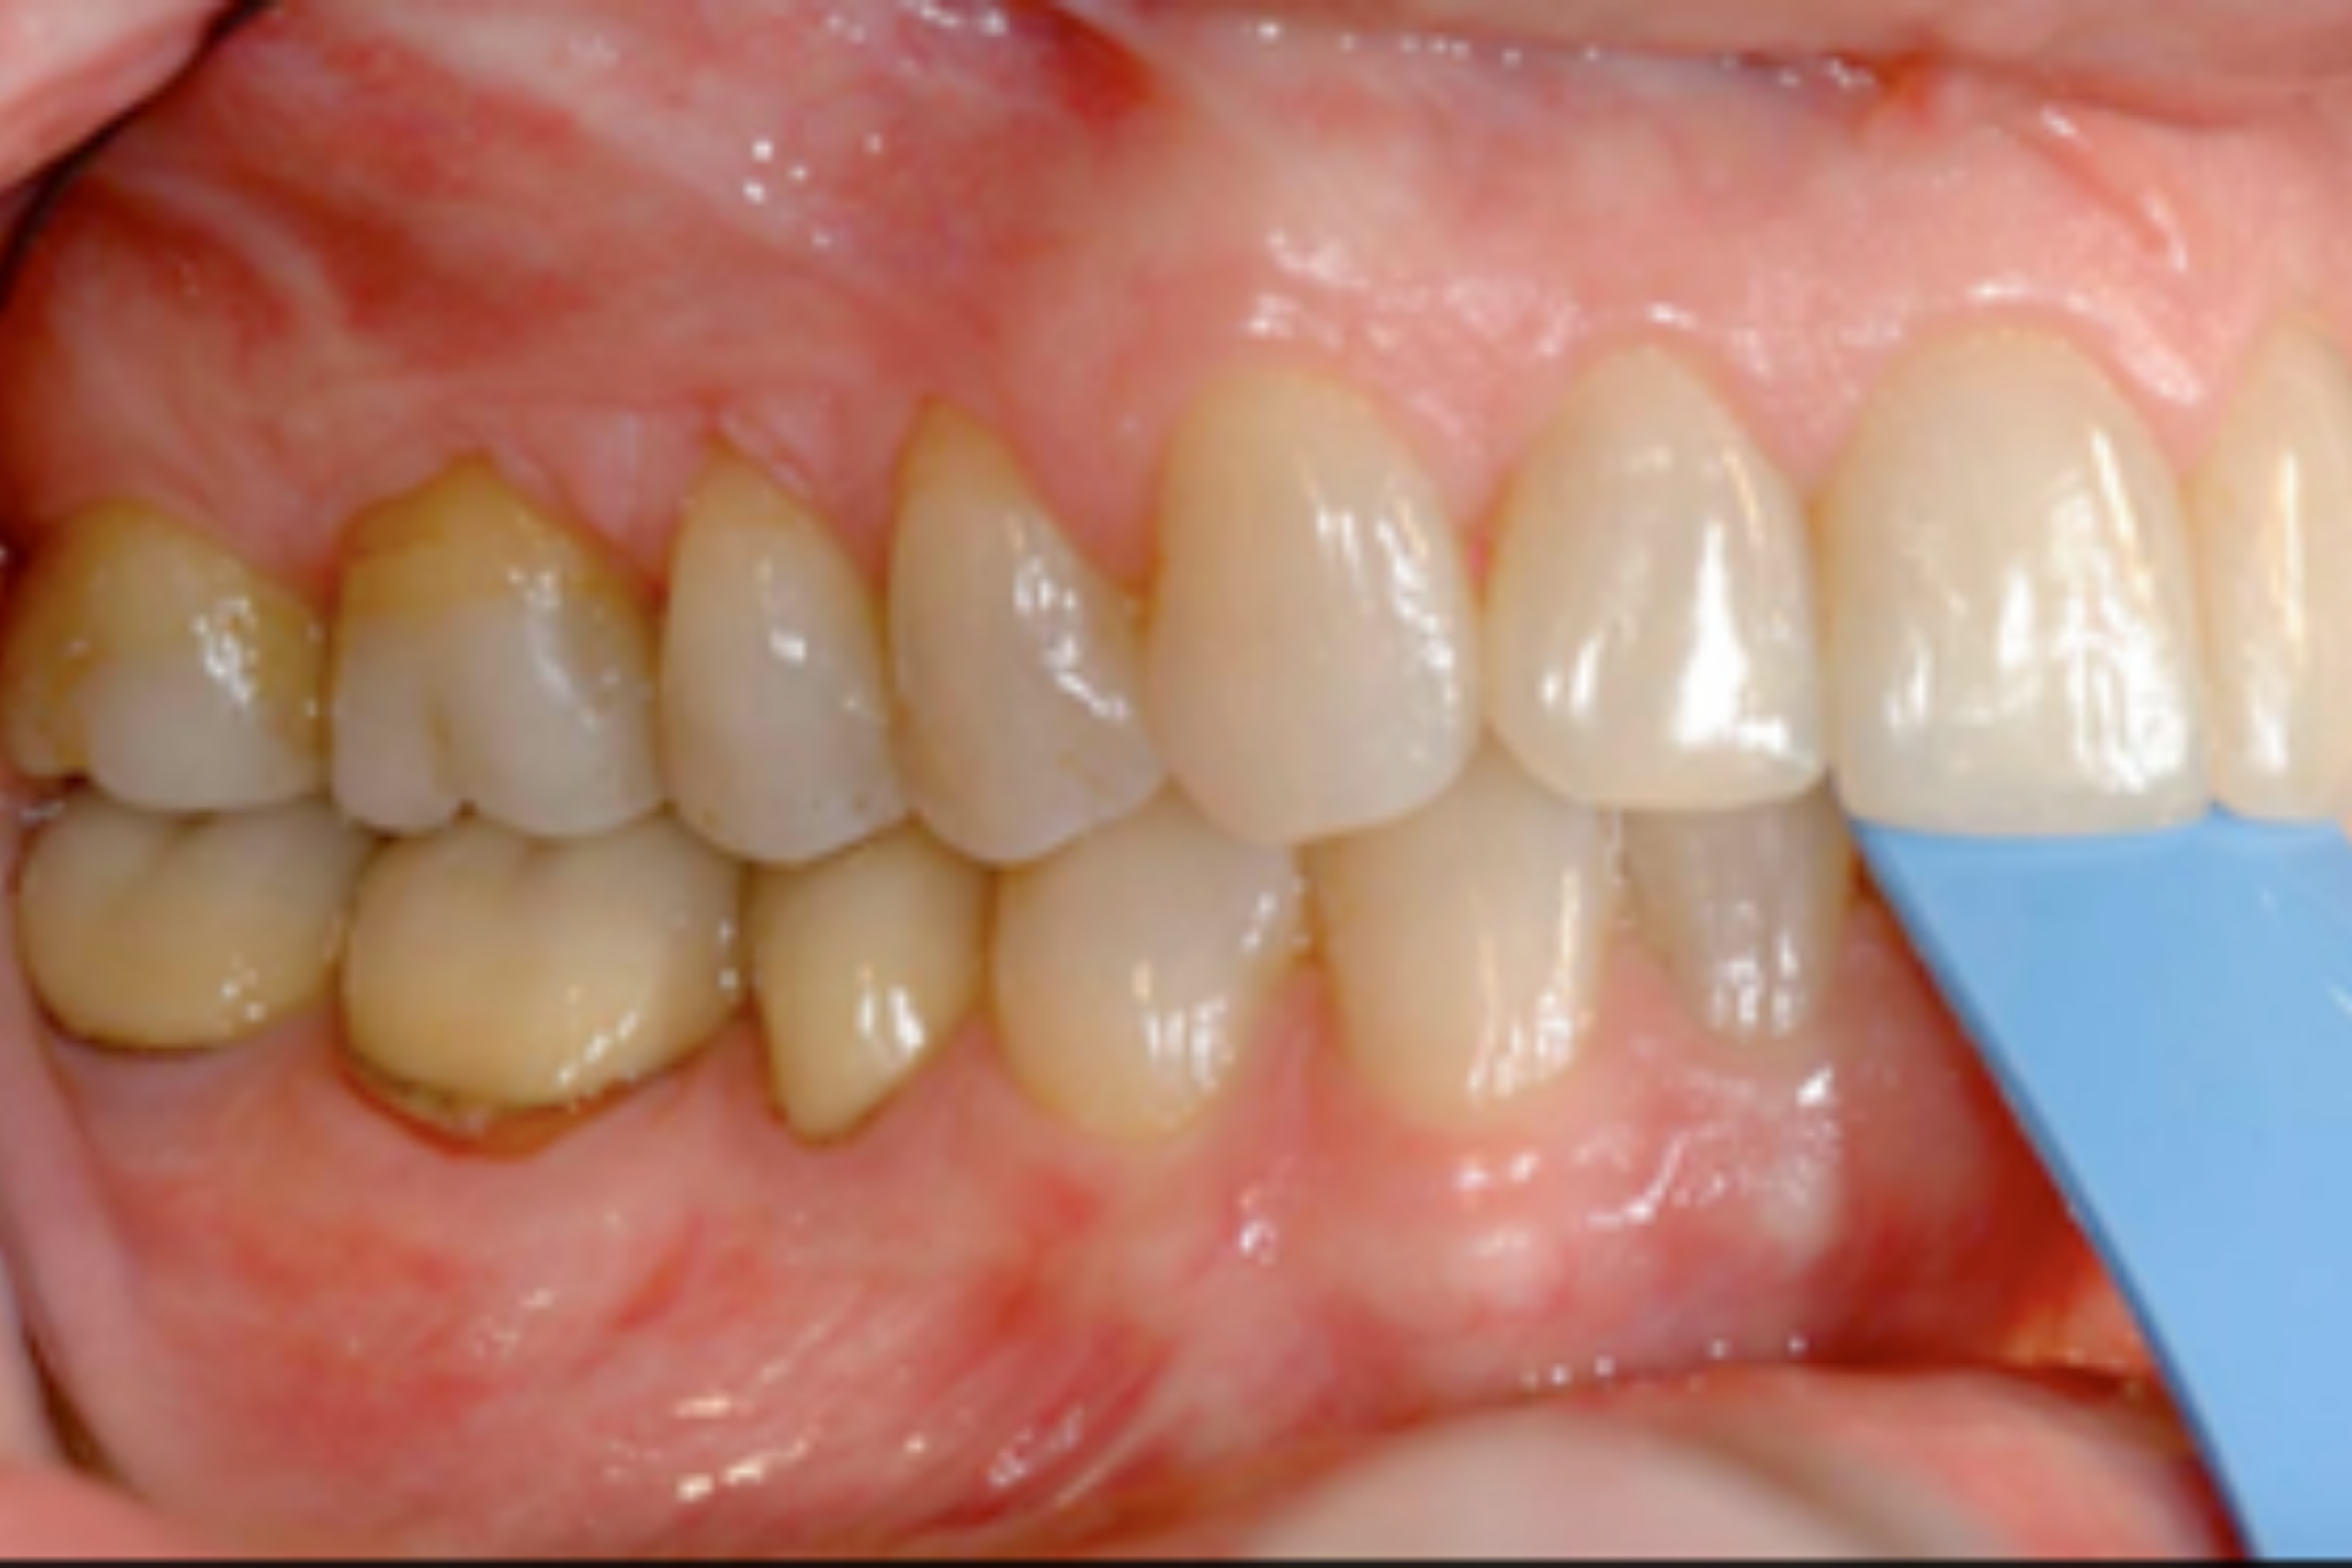
Isn’t it amazing how a leaf gauge dental tool, a bunch of thin pieces of plastic, provide so much useful, if not critical, information in everyday practice, but can also create just enough perplexity that we don’t use them at all?
Or is it that we don’t use them for each indication with focused intention because the indications are all jumbled in our brains? Or could it be that we think we can use leaf gauge dental tool once and gather information for all indications?
Even though it’s one tool that always looks the same, each time you use the leaf gauge dental tool, it’s best to view it as a separate tool. Ironically, the ease and convenience might actually work against us. It would almost be easier if there were four different tools, one for each indication.
A leaf gauge dental instrument is a thin, calibrated strip of plastic used to separate the posterior teeth for four distinct clinical purposes: loading the TMJ, deprogramming the lateral pterygoid, identifying the first point of contact, and obtaining centric relation bite records.
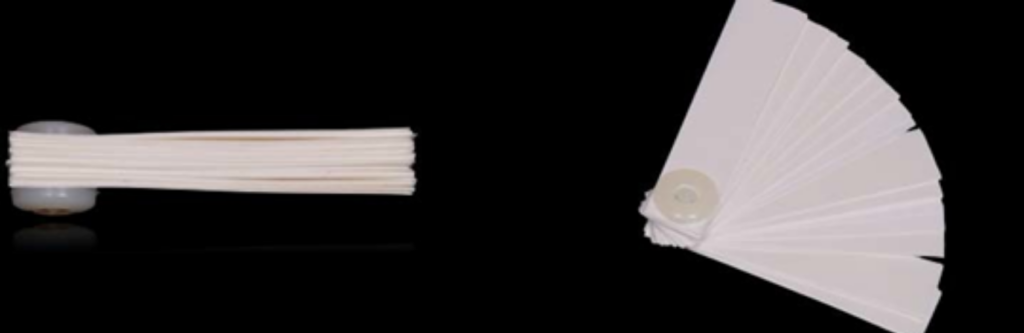
This article addresses all four leaf gauge dental uses in detail, treating the leaf gauge not as one tool with many uses, but as four different tools, each requiring its own mindset.
Each indication requires a slightly different mindset and even a slight variation of use. It can be simplified by intentionally focusing on the following for each:
- How many leafs are needed to start and why?
- What signs and symptoms are being evaluated?
- What is the intended goal or outcome?
Loading the TMJ
Using the leaf gauge dental tool (a.k.a., the Joint Loader Tool)
Think like an orthopedist or physical therapist. Can the joint be loaded and held comfortably?
If a healthy piece of cartilage is properly positioned between the ball and socket, and the ball is properly positioned in the socket, a very strong force or heavy load should be able to be comfortably applied and held. Using a joint loader tool and the masticatory muscles, a tripod is formed, comprising the two joints and the anterior teeth, creating a fulcrum to load the joints.
How many leafs are needed to start?
Enough to keep the back teeth apart, creating a fairly smooth and mostly horizontal path, while ensuring the opening is still within the arc of closure (rotation). Too few leafs feels flimsy and can create a definite vertical component, especially with a deep overbite. Too many feels bulky and could be too open, forcing the condyle down the eminence, beyond rotation (translation).
It’s as simple as, “Forward, back, lightly squeeze, like you are trying to bite on your back teeth.”
What signs and symptoms are being evaluated?
Is there tension, tenderness, or discomfort, specifically in front of the ear or the surrounding area? If so, is it the joint, muscles (most often the lateral pterygoid), or both?
What is the intended goal or outcome?
Evaluate for positive or negative load tests; is there pain? If there is no pain or discomfort, the documentation should be “negative load test,” meaning there were no positive pain findings, suggesting a current “healthy joint.”
In simple terms, this is a joint that has adapted well within the masticatory system, part of a safer patient with more predictable treatment outcomes than a positive load test. If it’s positive, the documentation is “positive load test,” meaning the patient reported some discomfort.
There are only two reasons for tension, tenderness, or discomfort when the joint is loaded: internal joint derangement or lack of release of the lateral pterygoid. The leaf gauge is used to load the TMJ and determine if any symptoms are present.
Deprogramming the lateral pterygoid
Using the leaf gauge (a.k.a., The Muscle Releaser Tool)
Think like a detective. You have a clue (a coded message) and half of a treasure map. By using the muscle releaser tool to decode the message, you can see the path to retrieve the other half of the map.
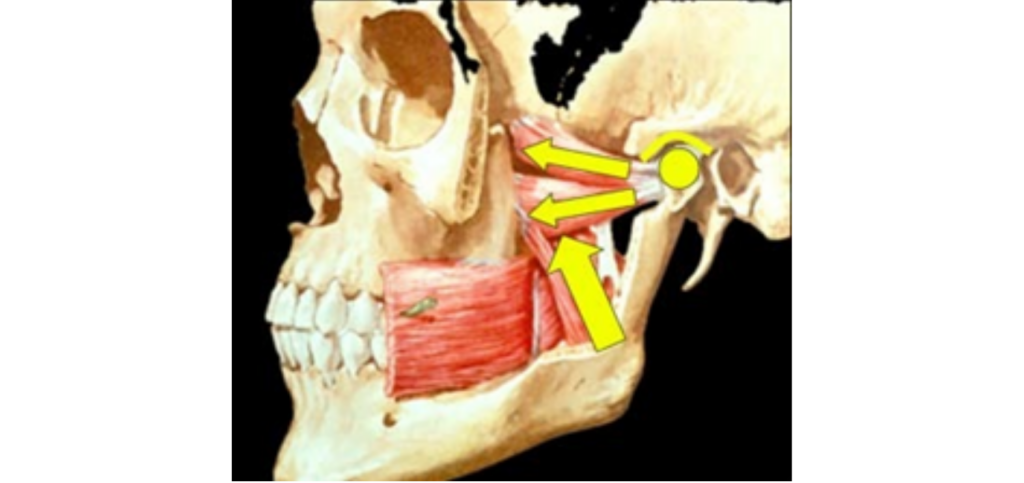
One route leads, somewhat smoothly, to the hidden treasure: centric relation, or a fully seated condylar position. The other leads down a potentially dangerous road: questionable compensatory habits and joint position. Using the muscle releaser tool properly can help alleviate some of the anxiety that comes with complicated-seeming patients. Keeping the back teeth apart and sliding back and forth on the tool gives the teeth a smooth platform to travel on, helping decipher which route applies.
It’s not uncommon for the lateral pterygoid to work almost constantly, keeping the mandible down and forward, most often compensating to avoid upper and lower teeth touching unevenly when the condyle is in a fully seated position.
After years of this compensation, it can initially feel uncomfortable to help the muscle release. By keeping the back teeth apart for an extended time and sliding back and forth on the muscle releaser tool, the lateral pterygoid learns that it does not have to work to avoid the unpleasant contact.
How many leafs are needed to start?
It really doesn’t matter, as long as no teeth are touching. It might be easier to slide back and forth on the plastic if there are enough leafs for a stable feeling, as opposed to a flimsy feeling of only a few leafs.
What signs and symptoms are being evaluated?
Initially, none. Just use the tool. It’s being used to release the muscle, that’s all. Keep the back teeth apart, slide forward, backward, and lightly squeeze a few times, maybe even many times over several minutes, to help the brain realize the muscle doesn’t have any reason to pull forward anymore because there’s nothing to avoid.
What is the intended goal or outcome?
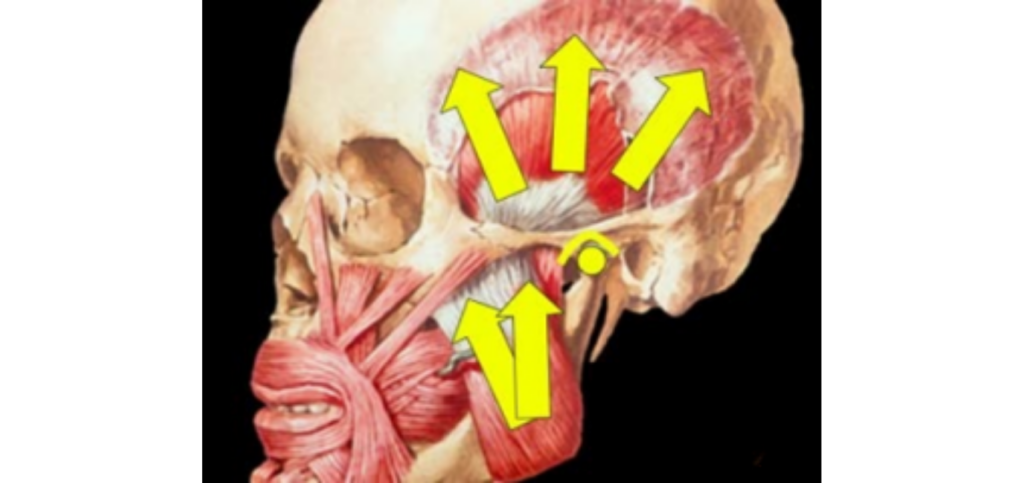
To assist the lateral pterygoid in releasing, and to find out if it is easy to release. The muscle releasing tool is used to trick the lateral pterygoid into shutting down for a few minutes.
If the lateral pterygoid can be convinced it doesn’t have to work, the muscles of mastication can assist the condyle into its physiologic position. If any tension, tenderness, or discomfort present when the joint was loaded has decreased, that is evidence that the path to centric relation will be smooth.
Although these first two leaf gauge dental tools may look the same, they have very different roles and provide very different information. The next two uses of the leaf gauge dental tool build on the same principle: two more tools that look nearly identical but serve entirely different clinical purposes.
Identifying the first point of contact
Using the leaf gauge (a.k.a., the Tooth I.D. Tool)
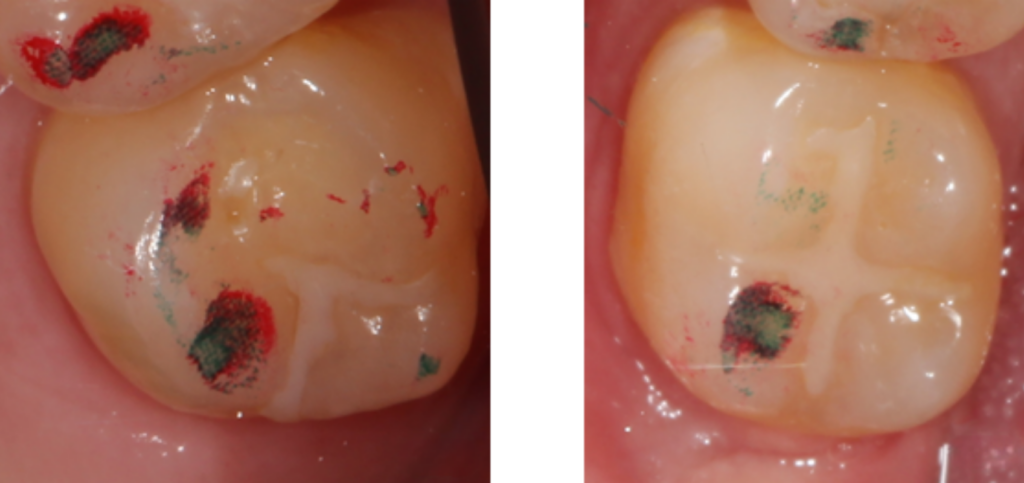
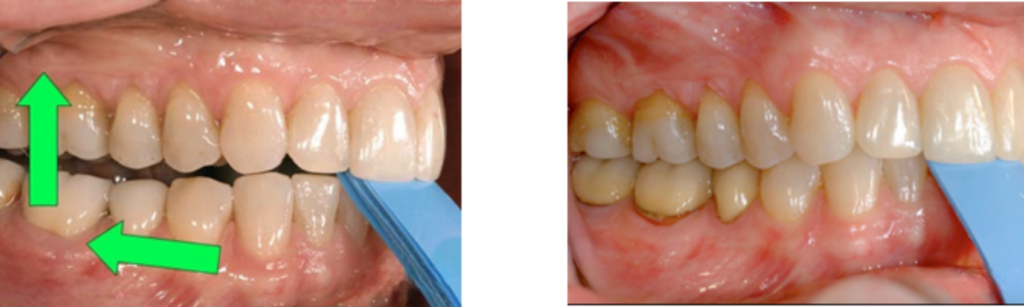
The Tooth I.D. tool is used to predictably identify which tooth or teeth touch in centric relation, or, at a minimum, the tooth or teeth that touch when the lateral pterygoid is fully released, based on the condition of the TMJ that day. This is the CR bite of the day.
Regardless of any other signs and symptoms, the Tooth I.D. allows the practitioner to initially keep all teeth apart while methodically removing leafs until the patient feels the first point of contact.
By asking the patient to move forward, back, and squeeze lightly like they are trying to bite on their back teeth, the tool will always guide both practitioner and patient to identifying the first point of contact. This is often referred to as leafing the patient down.
How many leafs are needed to start?
Enough to initially keep the back teeth apart, while teaching and reviewing the process with the patient. The process can be simplified with verbiage similar to the following:
“Right now, as you slide forward, backward, and squeeze like you are trying to bite on your back teeth, I assume you are only feeling plastic touch on your front teeth. I am going to remove a few of these leaves at a time and ask you if you feel anything else touching. We’ll do this several times until eventually you feel one or two teeth touch when you squeeze. Can you pay attention to me each time and let me know when you feel something besides the plastic on your front teeth touch?”
What signs and symptoms are being evaluated?
The only thing being evaluated is when the first tooth contacts. You and the patient may notice other signs and symptoms, but the only thing being evaluated is which tooth touches first.
What is the intended goal or outcome?
The goal is to release the lateral pterygoid while using the masticatory muscles to seat the condyle. The intended outcome, however, is to identify the first point of contact at that time.
Unlike the Joint Loader Tool and Muscle Releaser Tool above, which look similar but serve different purposes, the Tooth I.D. The tool is very specific and is the only one of the four tools in which the leafs are removed, and the teeth are allowed to touch.
Obtaining centric relation bite records
Using the leaf gauge (a.k.a., the Bite Holder)
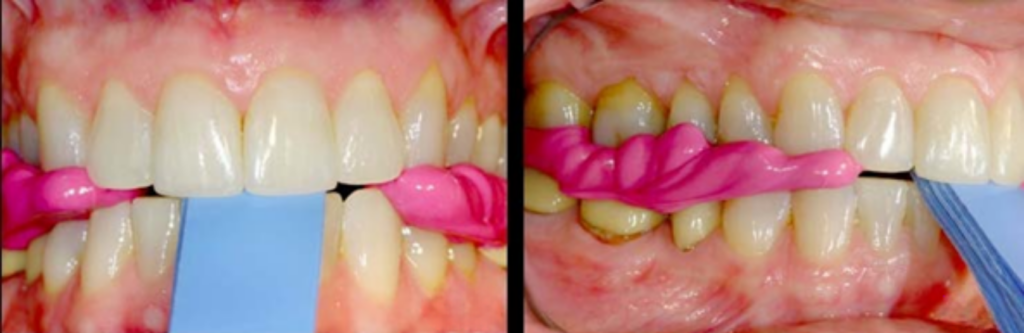
The Bite Holder not only helps the patient predictably and repeatedly slide into the desired bite position but also provides a solid holding area. In contrast, the bite registration is set up.
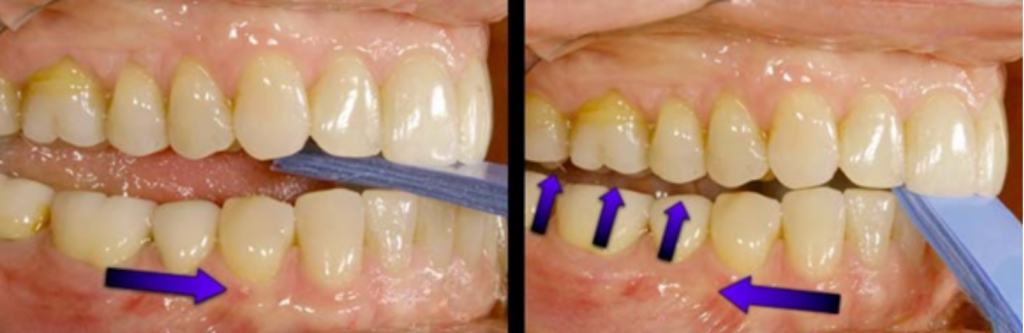
The best part about the Bite Holder is that it is adjustable, allowing for just the right space for the desired amount of material.
Practice with the patient several times while refining the space to the desired thickness.
What is that thickness?
That depends on what the record will be used for. Similar to the joint loading tool discussed above, it makes sense that the bite be recorded within the arc of closure, rotation rather than translation. For diagnostic casts and mounting models on a semi-adjustable articulator, the closer the record is to the axis of rotation, the more likely it will fall within the parameters of the arbitrary facebow.
With that in mind, it makes sense for the record to be as close to the first point of contact as possible without actually touching. It is equally, if not more, important to have enough thickness to properly trim the record to the cusp tips without sacrificing the integrity of the record. A record that is too thin is difficult to trim and may fall apart, becoming unusable.
How many leafs are needed to start and why?
Take a quick look at the overbite and overjet. How much space is needed to clear the back teeth initially? Excessive overjet requires more leaf contacts to separate the back teeth. A deep overbite will not take many leafs to get the back teeth apart.
What signs and symptoms are being evaluated?
None. The Bite Holder has only one job; the signs and symptoms were evaluated using the other tools.
What is the intended goal or outcome?
To create adequate space for the bite registration material and hold it in the best possible place on that day, as close to a fully-seated condyle as possible, with the lateral pterygoid as released as possible, while the material sets up. For most silicone bite registration materials, 1.5 mm to 2 mm at the closest point of contact is sufficient for the first point of contact while still allowing easy trimming to the cusp tips.
The Bite Holder is a wonderful leaf gauge dental tool that is easy to use, very predictable, and allows the practitioner to take a high-quality centric record.
Although all four of these uses rely on the same simple leaf gauge dental instrument, each serves a distinct clinical purpose. Treating the leaf gauge as four distinct tools, rather than one tool with four uses, brings clarity and consistency to joint loading, muscle deprogramming, first-point-of-contact identification, and centric-relation bite records alike.
Frequently Asked Questions
SPEAR Membership
Try Spear Free For 7 Days
See what a Spear Membership can do for you and your team before you decide. A free 7-day trial gives you full access to Spear Online’s clinical CE courses and practice team training, so you can find the membership level that fits your practice.
Featured Digest articles
Insights and advice from Spear Faculty and industry experts