The Implant Working Cast: 4 Steps for Fabricating a Soft Tissue Cast
Steps for Fabricating a Soft Tissue Cast
There are many reasons clinicians may choose to fabricate and utilize a provisional implant restoration. Rationale for implant provisionalization includes:
- Maximizing esthetics
- Refining functional design
- Interim restoration as an aid in sequencing or phasing a case
- Evaluating status of osseointegration, especially with a “questionable” implant
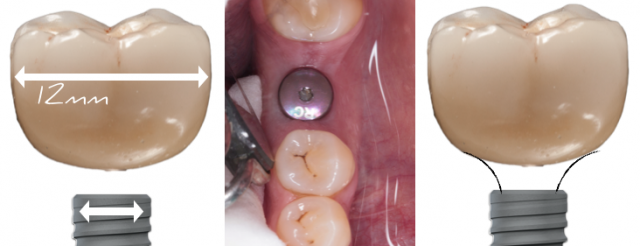
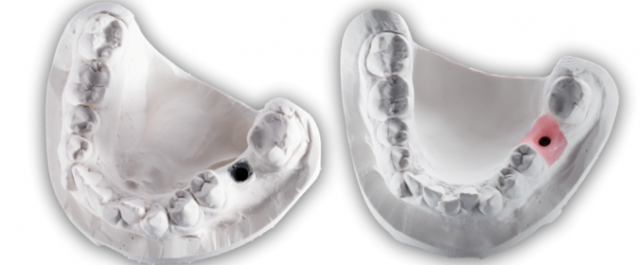
In the case above, I chose to use a provisional restoration to prosthetically sculpt the peri-implant gingival tissues. I wanted to create a more optimal connection between the desired supragingival restorative contours and the implant’s prosthetic connection. In other words, I wanted to create a customized emergence profile. Typically, we think about this approach for anterior implant restorations, yet the significant size discrepancy between the mesial-distal width of the edentulous space and healing abutment caused me take this additional step.
Several techniques for fabricating provisional implant restorations exist. Generally speaking, implant provisionals may be fabricated either directly or indirectly.


When using an indirect method, it is necessary to fabricate a working cast. In this two-part series, I’ll describe two techniques for fabricating an implant working cast. In this article, I will describe the steps involved with fabricating a soft-tissue cast. In the second article, I will describe the steps required for fabricating a stone working cast.
Inevitably, both clinicians and technicians will tend to gravitate toward a preferred method of cast fabrication. Nevertheless, it is always beneficial to know more than one way to complete a project.
Option 1: The Soft-Tissue Working Cast
Step 1 – Impression
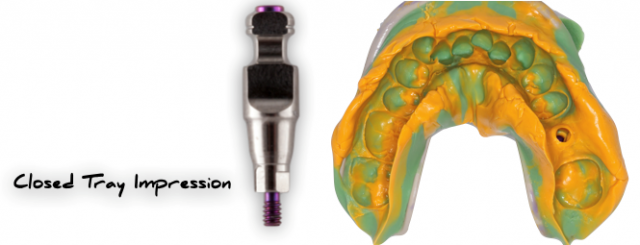
Make a fixture-level impression. In this example, I am using a closed-tray technique, but an open-tray approach would work just as well.
Step 2 – Connect Implant Components
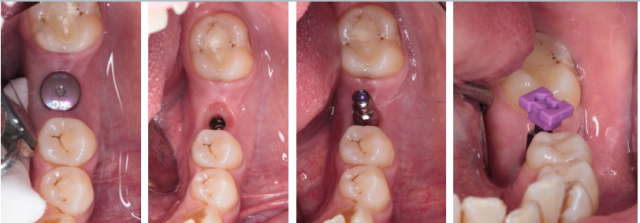
Remove the closed-tray impression post and replace the healing abutment. Chairside or in the laboratory, connect the impression post with an appropriate analog. Verify the components are seated and then insert the impression post/analog complex into the impression.
(Click the link to learn more about using an implant abutment placement jig.)

Step 3 – The Gingival Mask
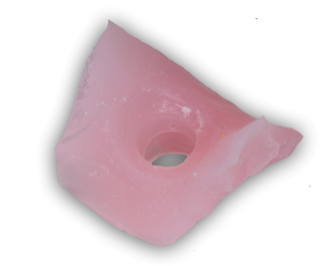
In this step, the silicone gingival mask will be added. Since the silicone tends to adhere to the PVS impression material, apply a thin layer of silicone separator to the impression (Divorce, Anaxdent USA). Next, syringe the soft tissue silicone (Gingitech, Ivoclar Vivadent). The Gingitech should cover the prosthetic connection, just apical to the head of the implant analog. Too much soft tissue silicone and the analog may become unstable in the cast.

Try to keep the Gingitech application tidy; if the gingival mask needs to be trimmed, it may be removed from the impression, trimmed with scissors and returned to the impression.
Step 4 – Pour and Trim the Stone
The final step in the cast fabrication process is pouring and trimming the stone. In this case, I’ve filled the tongue space and added a land with lab putty prior to applying a debubblizer. Next, vacuum mix die stone, vibrate the stone into the impression and allow the stone to set.
When the stone has set, separate the impression from the stone/silicone cast just like a conventional impression. Trim the cast to desired specifications; and enjoy the soft-tissue cast awesomeness!
(Click this link for five tips for better implant restorations.)
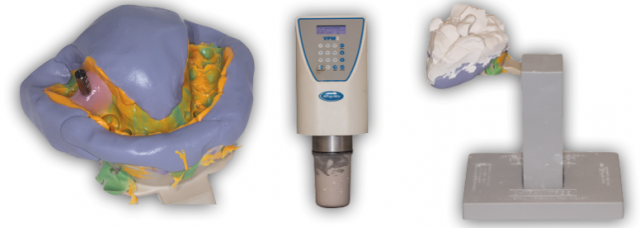
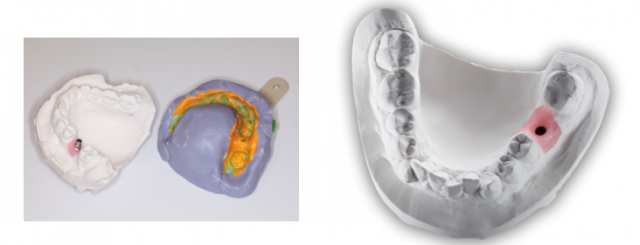
With the technique shown in this article, the most critical element in preserving accuracy in the working cast is reseating the impression post/analog complex in the impression. This step is so critical, in fact, that many clinicians choose to reseat the impression post and analog even in a situation where a technician is fabricating the cast.
In Part Two, I will describe an alternative approach to fabricating an implant working cast.
Darin Dichter, DMD, Spear Faculty and Contributing Author
SPEAR campus
Hands-On Learning in Spear Workshops
With enhanced safety and sterilization measures in place, the Spear Campus is now reopened for hands-on clinical CE workshops. As you consider a trip to Scottsdale, please visit our campus page for more details, including information on instructors, CE curricula and dates that will work for your schedule.

By: Darin Dichter
Date: February 10, 2016
Featured Digest articles
Insights and advice from Spear Faculty and industry experts
