Guided Implant Placement For the Edentulous Arch — Dual Scan Technique
Years ago, when we started placing implants to help retain and support dentures, we would develop a surgical guide. It was a time-consuming process that involved the duplication of the current denture, and it could take multiple appointments. There was usually an extra lab expense, and the duplicate denture was often made from a radiopaque material or with radiopaque markers to help “plan” implant placement with a panoramic X-ray. We would then use a “clear” surgical denture guide during the surgery, where implant placement was free-handed, and the use of guide pins helped direct the implants into the intaglio surface of the surgical guide.
Fast-forward to today and dentistry continues to evolve and change in a multitude of ways. With the continual flow of technology, it seems that we’re only starting to hit the “technology” stride in dentistry. We are seeing dental procedures become more digitally based, which can make the overall outcome quicker, easier, and more predictable. As with almost all technology, there’s a learning curve that comes along with it, and it can be challenging and frustrating in the beginning. But with some help, it can streamline this process!
Technology and implant placement go hand-in-hand in today’s dental world and are quickly becoming the standard of care with 3D CBCT scans, digital treatment planning, and fully guided implant surgeries and placement. So, where do we start with the edentulous patient today?
First and foremost, we must determine the final goal or outcome that is desired by the patient and the restoring doctor. Are we developing a treatment plan that will simply convert their current denture to an implant-retained denture with the use of a few implants or are we attempting to create an implant-supported and screw-retained fixed final restoration with multiple implants?
This article will focus on how to create a surgical guide for implants that will support an implant-retained final overdenture prosthesis. (With some modifications, we could also use the same process to place multiple implants for either a fixed removable or fixed hybrid final prosthesis.)
When it comes to developing a surgical guide for the edentulous patient, the patient usually presents to our office in one of a few ways — either with old and worn-out dentures needing new dentures and interested in implants, or with a relatively new set of dentures, having discovered that dentures are not exactly what they signed up for and looking for a solution to their problem.
If the patient hopes to use their current denture, we must determine whether the current denture is acceptable or if we’ll be making a new one. One of the very first steps in denture fabrication is determining whether the current denture has acceptable esthetics.
When we were in dental school, we all learned that esthetics was one of the first steps in the denture process and it was determined by the position of the maxillary central incisors (also the first part of facially generated treatment planning). We also have to determine if the overall occlusion is acceptable, evaluate the current denture’s overall fit and finish, and determine the stability on the tissue. Many times, patients may have an older, worn denture that may “fit well” to the patient but the overall esthetics are poor, or the tooth position and occlusion are incorrect, or it doesn’t fit well or even look good!
With patients who have a current denture that has acceptable esthetics, we have to make sure that the current denture has an intimate fit and finish to the soft tissue and is stable. The final surgical guide will replicate the intaglio surface of the current or new denture, and it will only fit as well as it does.
A poor-fitting denture that’s scanned equals a poor-fitting surgical guide, which equals even more error introduced into the final placement of the implants, increasing surgical risks and complications, and ultimately leading to a final outcome that’s less-than-desirable for everyone involved.
If the current denture doesn’t fit well, we have to complete a hard reline of the current prosthesis to ensure an intimate, stable fit. If it is stable, fits well, and looks great, we can focus on moving forward in this process and developing the number and placement of the implants to support the final overdenture design and the surgical guide required.
If the current denture esthetics or fit is poor, it may be best to start by developing a new denture, where we have full control over the esthetics as well as the fit and finish of the final prosthesis. We would want to have the new denture to a point that it is ready to process and delivered.
Once we have a denture that has acceptable esthetics, fit and finish, we can now proceed with the digital part of treatment planning for the implant placement and surgical guide (unless you developed your denture digitally, which is now a possibility!).
Nowadays, we can take the denture, apply radiopaque markers to it, and scan the patient and prosthesis quickly, easily, and without extra visits, costs or doing a lot of extra work. To proceed, we have to place radiopaque markers on the denture in a manner that allows software programs like Simplant (Dentsply Sirona) to be able to merge the scans together accurately.
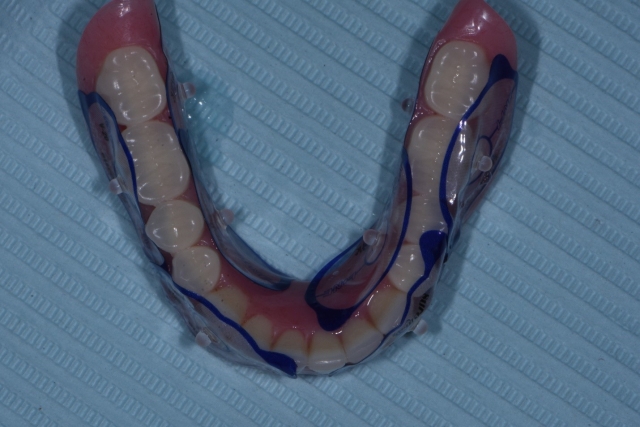
There are a variety of ways to add these markers to the denture, but the one I’ve found to be quick, easy, nondamaging, inexpensive, and very accurate is the use of radiographic markers by Suremark. These are markers that have a radiopaque ball on a removable sticker that you can place on the patient’s dentures.
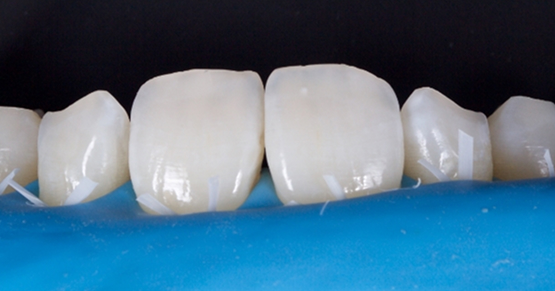
Before scanning, we want to place a minimum of six to eight radiographic markers on each denture—ideally on facial and lingual surfaces — and you want to keep them below the occlusal plane so they don’t interfere with the occlusion and any bite registration material used does not adhere to them (Fig. 1). Once we have them in place, we’re ready to proceed with the dual scans needed to develop and finalize the surgical guide.
The first scan can be completed by placing the dentures in the patient’s mouth and then placing a radiolucent bite registration in a manner that keeps the teeth slightly apart. Why? A radiopaque bite registration blocks out the denture anatomy and tooth position present.
It is important to keep the teeth apart so when the scans are complete, there are no data points or denture anatomy overlapping in the scans and we can see the incisal edges as well as cusp/fossa positions clearly. Once the dentures are clearly seated, you’re now ready to complete a full CBCT scan, making sure that all anatomy is clearly incorporated into the scan.
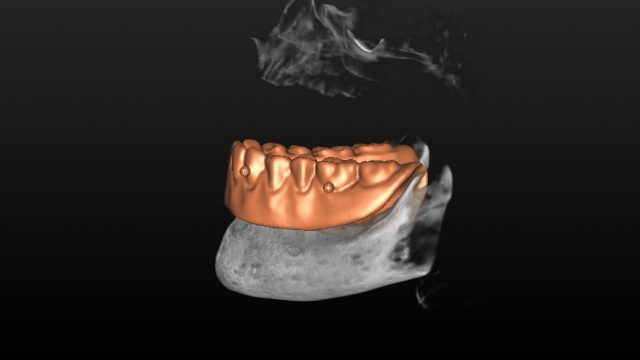
Afterward, without removing any of the radiopaque markers present, we’re now ready for the second scan in the CBCT. This is done by placing the denture onto a holder that allows for the denture to be parallel to the floor and in a relative close proximity to the first scan. (Note: Some manufactures have stands that are designed just for doing this.)
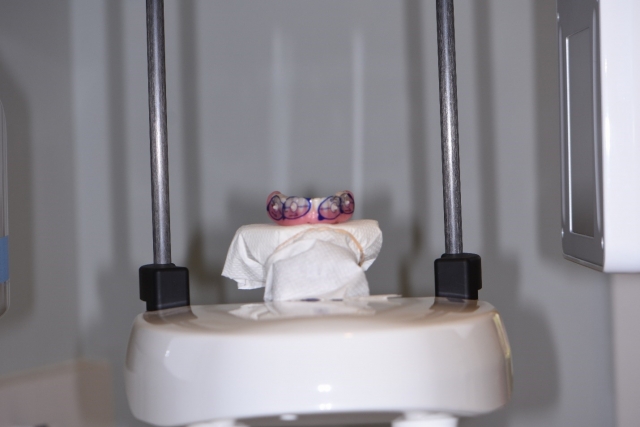
I’ve found that because of the nature of the material in dentures, I will reduce the overall exposure setting to allow for minimizing any data lost that can occur at higher settings. This scan will allow for a clear, digital replica of the denture with the markers in place.
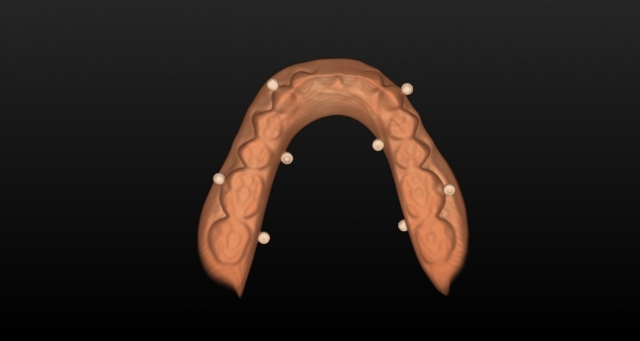
Now that both scans are complete, you can either use your software or software programs like SimPlant (Dentsply Sirona Implants), which has free online services like DentalPlanit, that will merge the data points between the scans. This allows for clinicians to clearly see the patient’s anatomy as well as look at implant restorative space, implant position, angulation, etc., during the implant planning process with and without the denture prosthesis in place.
Now that all of the data has been collected and merged, the practitioner can choose to either design and construct the final surgical guide or send it to a dental lab or service to do the initial design and digital placement of the implants.
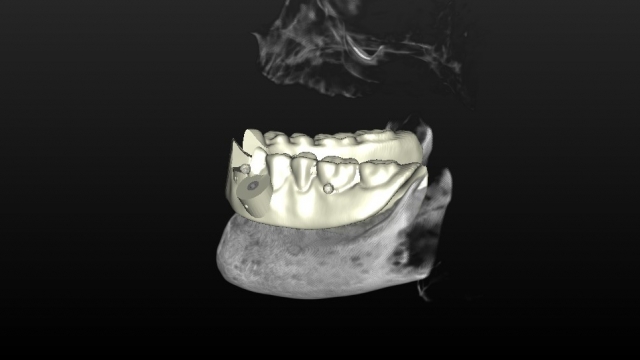
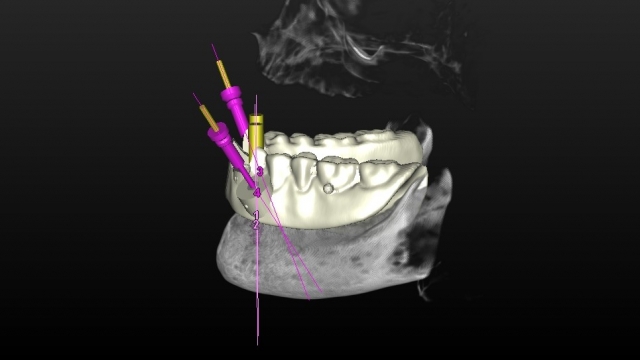
Ultimately, when it comes to the final placement of the implants and the surgical guide design, both the surgeon placing the implants and the restorative dentist should collaborate, finalize, and approve the surgical guide before it’s fabricated. Ideally, the final designed surgical guide showing implant placement should be shared with the restoring dental laboratory for input toward the final design of the prosthesis desired. This should allow for an optimum outcome for the surgeon, restorative dentist, lab technician and, ultimately, for the patient!
SPEAR NAVIGATOR
Transform how your practice runs by engaging the team through
coaching and training
A guided path to excellence through structured coaching and self-guided resources that will align your team, streamline processes and drive growth. Transform your practice by implementing Spear’s proven playbooks for developing and retaining a high-performing dental team.

By: Jeff Lineberry
Date: August 5, 2018
Featured Digest articles
Insights and advice from Spear Faculty and industry experts
