An Intro to Basic DSLR Camera Settings
In the previous article of this photo series, Dr. John Carson talked about the types of camera options available, as well as the importance and impact of using photography in your practice. In this article, I’m going to walk you through some fundamental camera settings to help you get started using photography in the manual mode, where you’ll have the most control over the outcome of your photos..

Even if you use a camera that has preset portrait and intraoral modes (from PhotoMed, for example), it’s important to know a little bit about the settings that are getting you the results you’re used to. If you’re in the middle of taking a series of photographs on a patient and the pre-settings aren’t cooperating, even a limited understanding of your camera can go a long way.
The two most important camera settings you’ll work with are the aperture and shutter speed. The aperture is the opening in the lens that allows light to pass through. When you press the button on your camera to take a picture, a hole opens that allows your camera’s image sensor to see the scene you’re capturing in the photo. The aperture you set determines how big or small that hole is, which in turn determines how much light is let in. The larger the hole, the more light.
Aperture in focus for clinical photos
The aperture setting is measured in “F-stops”.

Moving from an F-stop of f/5.6 to f/8 halves the amount of light getting through. Moving in the opposite direction, from an F-stop of f/5.6 to f/4 doubles the amount of light coming through.
F-stops can be a huge source of confusion in photography because the larger the F-stop, the less light gets through. This is because the F-stops are actually fractions. F-8 is actually one-eighth. Moving from an F-stop of f/4 to f/8 really means you’re moving from one-fourth to one-eighth, which is a smaller number, so less light is let in. This is where the confusion sets in.
Aperture determines the depth of field of the photograph. A deep depth of field means that you can see a lot of things in focus in the photograph. A shallow depth of field means only one area is in focus and the surrounding areas are blurred.
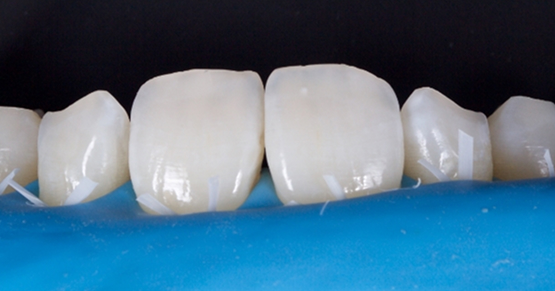
In dental photography, you want to be sure you’re using a deep depth of field so everything is in focus. When you’re taking a smile photo, you want the central incisor to be as sharp as the first molars filling out the buccal corridor. Although a shallow depth of field can get you some interesting photographs and make things look “artsy,” you’ll want to stick with large depths of field in dentistry.


Shutter speed
The other factor that determines the amount of light being let in is shutter speed. While aperture determines the size of the hole allowing light through, shutter speed determines how long that hole is open for.
A fast shutter speed lets in less light because it closes quickly, while a slow shutter speed will allow the hole to stay open for longer, letting more light in. The slower the shutter speed, the more difficult it becomes to keep an image in focus, eventually necessitating a tripod or something to steady the camera.
Long shutter speeds are great for getting action photos that show movement, such as a runner where you want to see the leg in motion:

In dentistry, we want crisp images, so you’ll want a high enough shutter speed to capture a photo in focus using hand-held photography.
ISO and image quality in dental photography
The third setting you’ll want to have a basic understanding of is the ISO, or International Standards Organization setting, which determines how sensitive your camera is to light. A higher ISO means you’ll be very sensitive to light, whereas a low ISO like 100 will give you less sensitivity.
As a general rule, the lower the ISO setting, the higher the quality of the image. The greater the ISO, the more sensitive to light and the more “noise” you get in the photo. Noise makes an image appear grainy. You typically have to use a high ISO in low-light settings (at a concert where flash photography isn’t allowed), whereas you’re able to use a low ISO in bright light settings (at a cookout on a sunny day).
In dental photography, because we use a twin or ring flash, we can use an ISO setting of 100 or 200 and keep the quality high and the noise low. Below are the typical camera settings on my Canon 60D in manual mode, using a 100mm lens and a Canon MR 14EX II Macro ring flash.
- ISO: 100
- Shutter speed: 1/200
- Aperture: f/32 for intraoral photography, and f/11 for portraits
These may not be the perfect settings for your camera, but they’re a good starting point. If you grasp what shutter speed and aperture do, you can quickly figure out how to take an underexposed photo and change your setting to brighten it, or vice-versa. Keep in mind you want to keep your ISO at 100 or 200, a wide depth of field to keep everything in focus, and a shutter speed high enough to shoot sharp images.
FOUNDATIONS MEMBERSHIP
New Dentist?
This Program Is Just for You!
Spear’s Foundations membership is specifically for dentists in their first 0–5 years of practice. For less than you charge for one crown, get a full year of training that applies to your daily work, including guidance from trusted faculty and support from a community of peers — all for only $599 a year.

By: Courtney Lavigne
Date: April 29, 2017
Featured Digest articles
Insights and advice from Spear Faculty and industry experts


