8 Considerations in Denture Relining
We’ve all been trained to create complete dentures. However, I want to share some relining tips to ensure the final result meets the patient’s expectations and your ideal prosthetic outcome. Relining involves resurfacing the tissue side of a denture with a new material to fill the gap between the original denture and the altered tissue contour. We know that for complete dentures currently in use, we need to periodically evaluate and adjust the fit. This helps improve the long-term performance of the prosthesis.
#1 Examine the Borders
If the patient has never had a reline and worn the denture for over 10 years (and, yes, these patients exist), the borders will probably need to be molded. If they look short of the vestibule, then (like your initial denture impression) start there. You want to develop functional vestibular anatomy, but if the denture feels unstable and tips or slides easily, stabilize the palate before you start the border molding. You can do this by placing three-quarter-size areas of material to triangulate it, and once set, it will provide a nice stop for you.
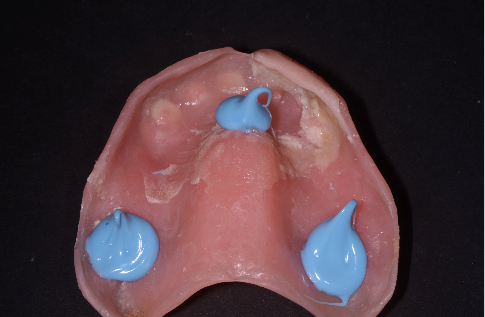

You can also do this on the lower denture by putting a smaller amount on the retromolar pad depressions and one in the midline.
If you don’t do this when you border mold, the denture base seating won’t be repeatable, and the border molding could result in inaccuracies that you will spend time adjusting after processing. Think of it this way: You use the existing denture like your custom tray.
I suggest using a medium- or heavy-body vinyl polysiloxane material for the borders and a light-body wash to impress the supporting tissue.

#2 Microetch or Use an Acrylic Bur to Roughen up the Borders and Intaglio Surface
It gives a fresh surface for the adhesive to stick to. If there was a healing soft-tissue liner in the denture, I remove as much of it as I can.
#3 Segmentally Place the Impression Adhesive and the Heavy-Body Material
I will do right and left sides and then finish with the posterior border.
#4 Be Careful How Much Impression Material You Use
Generally speaking, you need less than you think. When border molding, you can just express onto the rim only the thickness of the mixing tube and wait until you see it start its initial set. I check that it can no longer be easily displaced with a thin spatula. It will retain its shape better once you place it in the mouth and begin the muscle molding. If you insert it right after dispensing it, it can completely fall off the border, and you must start over.
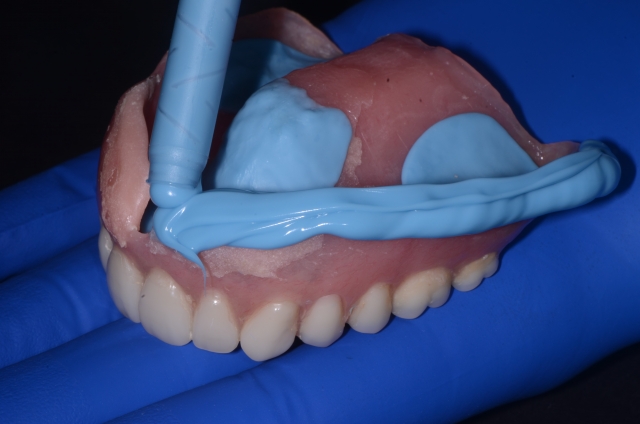
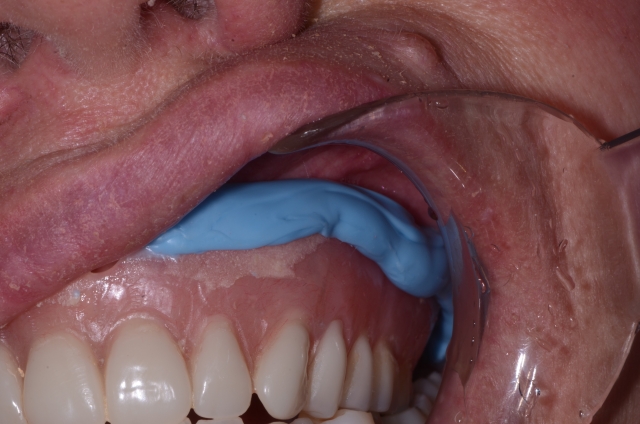
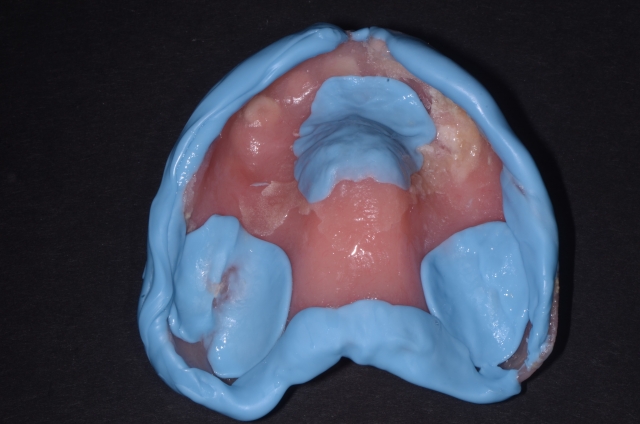
#5 Place Three Vent Holes in the Denture Base (#6 Round Bur)
On the maxillary denture, I place one by the incisive foramen and the other two in the tuberosity region. I prefer to do this, especially when there is flabby tissue on the anterior ridge. Venting the denture will not compress that tissue as much.
On the lower, I would place vent holes on the retromolar pads and one in the midline of the anterior space.
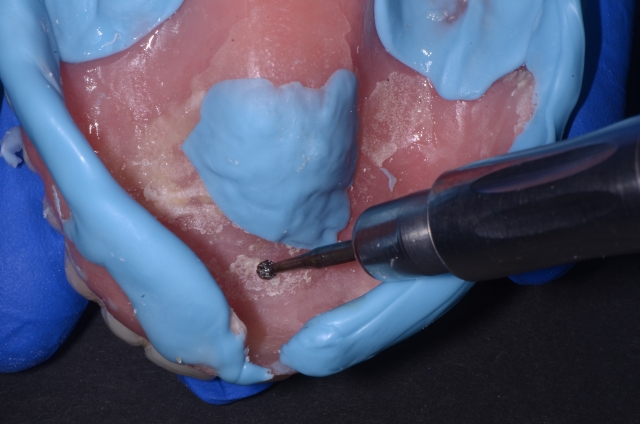
#6 Be Considerate of How Much of the Light-Body Material to Use
I am very considerate of how much light-body material I use and how I seat the denture for the impression. Again, be careful to put initial pressure on the posterior borders and remove excess material. If you don’t, the posterior border will drop down toward the tongue, and the impression material will be too thick. If processed like this, your patient will tell you that the posterior border feels too thick and different from before.
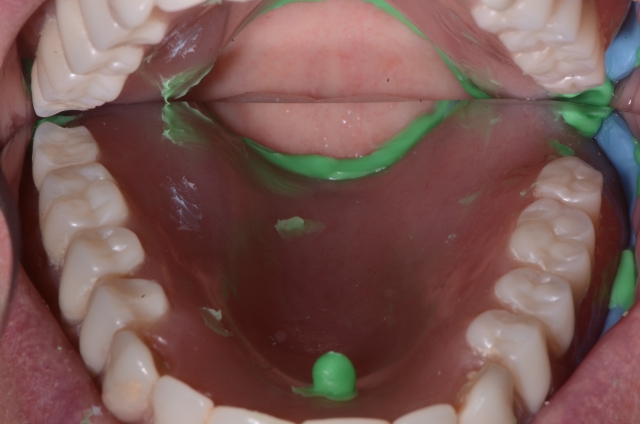
#7 Ask the Patient to Bite Down Gently to Maintain the Vertical Dimension of Occlusion
Once I am comfortable that the posterior border is level and seated, I ask the patient to bite down gently to maintain the vertical dimension of occlusion. (Note: I have measured this by placing a red dot on the patient’s nose and chin.)
I use a bite registration material to make a bite registration prior to the final impression so that the patient can close right into it, thus allowing me to check the vertical dimension again. Many clinicians feel this will insure the patient is biting correctly and allows you to preserve the interocclusal relationship of the denture.
(Click for bite registration tips.)
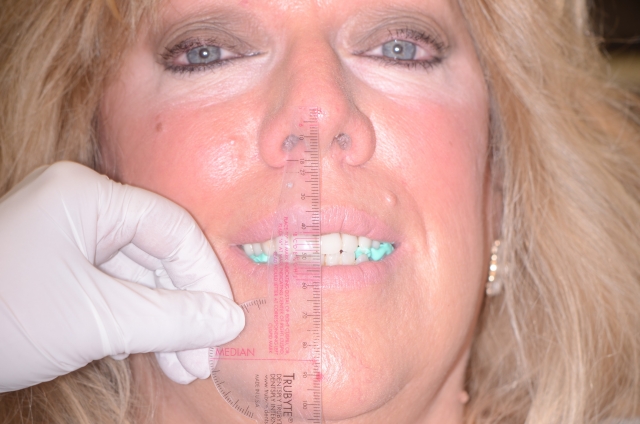
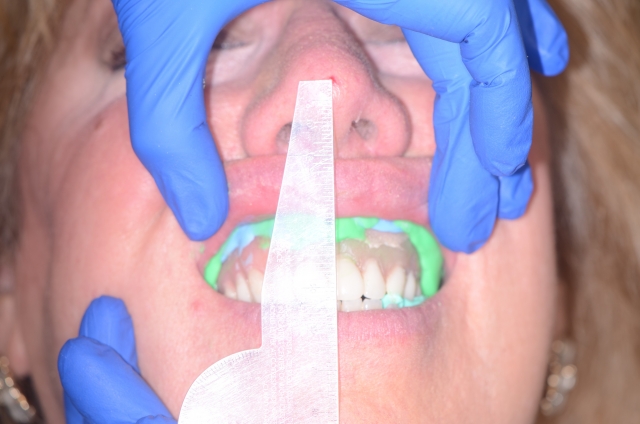
Once the patient closes gently, I check that the vertical is maintained.
#8 Impress the Upper First and Leave It in Place When Impressing With the Light-Body on the Lower
When relining both upper and lower, I impress the upper first and leave it in place when impressing with the light-body on the lower. I have the patient close their mandible as they put gentle pressure (“gentle bite”) on the upper and maintain that until the lower sets. I stay with my patient and hold their chin up to ensure they don’t open up even a little. The stability, retention, and esthetics can be adversely affected if there is an increase of more than 2.0 mm in the existing vertical dimension.
If the material burns through to the denture base, I will note it as a possible area for adjustment after inserting the denture.
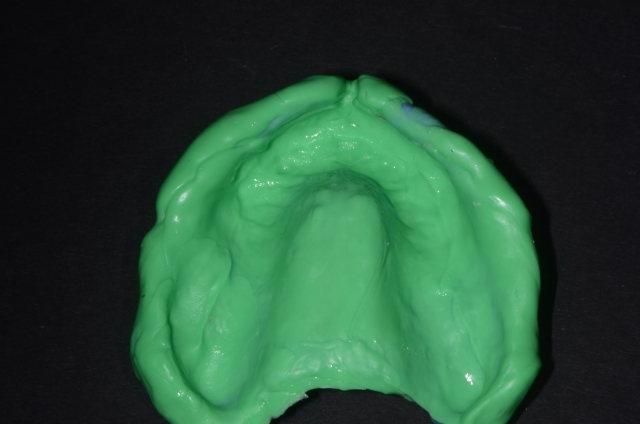
Although some clinicians will chill the impression material to yield more working time, I have never found that necessary. If you are able to methodically border mold and then complete the impression with a light-body wash, you will have sufficient working time.
The final success is predicated on meticulous lab processing procedures. The lab that successfully fabricates your original dentures will likely also perform the relining process well, ensuring a perfect result.
SPEAR campus
Hands-On Learning in Spear Workshops
With enhanced safety and sterilization measures in place, the Spear Campus is now reopened for hands-on clinical CE workshops. As you consider a trip to Scottsdale, please visit our campus page for more details, including information on instructors, CE curricula and dates that will work for your schedule.

By: Mary Anne Salcetti
Date: May 21, 2021
Featured Digest articles
Insights and advice from Spear Faculty and industry experts

