Class II Resin Restorations: Quick Tips to Help Manage the “Step Child” of Direct Restorations
By Jeff Lineberry on July 27, 2015 |Over the past decade, there has been a huge shift in dentistry going from using amalgam or "mercury" fillings in posterior teeth to being "metal free," via direct resin restorations.
Every day in dental practices all over the world, dental professionals complete one of the most common dental restorations; yet it can be one of the most challenging and under-paid procedures: the Class II direct resin restoration.
When I graduated in 2000 from dental school, we were one of the first classes that had direct posterior resin restorations as part of our dental school curriculum, and we were assured that in the future we would all be “bondodontists” meaning that we were going to be bonding everything. At that time, posterior resin restorations or “white fillings,” were thought of being “pretty,” but not long lasting, and on top of that, they were even more technically challenging and time consuming to place than a regular amalgam or “silver” filling. So, it raised the question: “Why would you put a tooth-colored filling in a back tooth? ” Well, here we are 15 years later: bonding and posterior resin restorations are very much mainstream dentistry as patient demand along with material advances, have made them predictable and long lasting.
Over the years, I have found that one of most challenging restorations and one that can be time consuming is the class II posterior resin restoration. On top of that, if you compare the time you spend placing a very nice class II resin restorations from start to finish to other restorations we complete, especially ones that incorporate more than a few surfaces, it can be difficult to get paid on the same order as we do for many other procedures.
So, what have I learned after placing direct resin posterior restorations for 15+ years and why are they more challenging than other direct dental restorations, especially the class II ones? First off, like all restorative procedures, especially the ones that require bonding, you have to keep it isolated from saliva, blood and other contaminants.
Another big challenge, if not one of the biggest ones, in placing and doing a great class II resin restoration, is to get ideal contours and ideal interproximal contacts. If you are like me, I learned using the good old tofflemire matrix, which had been used forever doing class II amalgams, and it worked great…..for amalgams! I found even when I burnished, wedged and pre-wedged these older type matrix bands, I would be praying that I got a good proximal contact, even if it didn’t have the greatest contours. Sound familiar? Once I got out of dental school, it didn’t take me long to decide that there had to be a better way: the sectional, pre-contoured matrix band and retaining rings was the magic I needed to make class II resins predictable and straightforward. I have used a variety of these systems over the years, and they work (some better than others) well for a typical class II restoration and you get tight proximal contacts and nice contours. Unfortunately, they do have their drawbacks too: if you are missing too much tooth structure or the proximal boxes extend too far onto the facial or

lingual, then it can be a difficult to keep them in place.
It’s critical to make sure you have the gingival margin area dry and not seeping between the tooth and your matrix band, which can be managed well with a wedge. Even wedges have changed: we used to have only wooden ones but now we have plastic ones that are pre-shaped, flexible, etc.
Now, you have your tooth isolated, matrix band in place and now you have to do a great job placing your bonding agent of choice: that means following manufacture’s recommendations to a “T,” placing an adequate amount onto the properly prepared dentin surface and curing it adequately. In class II restorations, this can be challenging since the proximal box can difficult to access adequately and to evenly distribute the bonding agent and avoid “pooling” of the bonding agent. These things alone will help you tremendously with another common issue and often frustrating issue with posterior resin restorations: sensitivity. I’m sure if you have done enough of them, you have had at least one that is sensitive: Some a little, some a lot. Either way, you and your patients won’t be real happy if you get a lot of phone calls and post-op appointments trying to sort out why their tooth is sensitive now versus no problems before.
Finally, you are ready to place the resin, but wait, do you bulk fill, incrementally fill, use a flowable liner, etc.? The list goes on and on, but personally, I have found that using a little flowable resin that is radiopaque is helpful managing the adaptation of the resin in the proximal box and how I place the resin depends on the depth and size of the proximal box. And a quick curing, high-intensity curing light will save you a lot of time over the course of a year, so it’s worth every penny you spend on it.

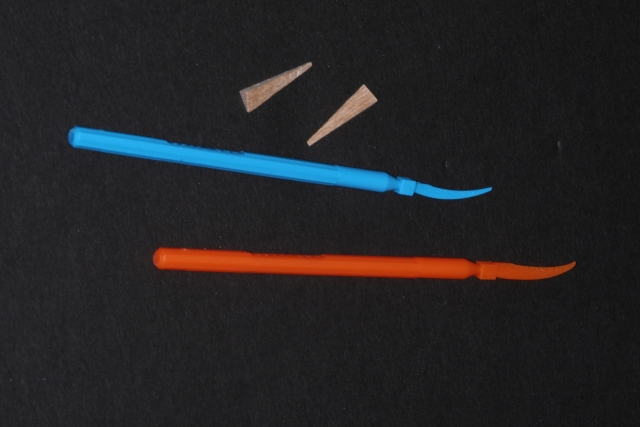
Once you get your matrix band out of the way, you have to make sure there is no flash or overhangs present, and if you did a great job placing your wedge and matrix band, then this will be minimum at most. I have found a good Bard Parker handle with a #12 blade or a nice sharp scaler to be really helpful managing these difficult-to -ccess areas. It is then we are ready to adjust the occlusion, floss (sometimes, it is even hard to get floss through; a good serrated metal finishing strip is great for helping with this along with getting rid of any bonding agent between adjacent teeth) and polish.
I will then often get the patient, unless their tongue is numb, to run it over the restoration. It’s a great way to find any rough or sharp areas that you may have overlooked. And if you are wanting a great way to finish it so that it is as smooth as the natural tooth: use a felt polisher and some diamond polishing paste running in a slow speed dry on the tooth and allow it to run until the polishing paste disappears.
Now, you are done! So, as you can see, posterior resin restorations, especially class II ones, can be challenging and time consuming, yet can be a great service to your patients.
Jeff Lineberry, DDS, FAGD, FICOI Visiting Faculty and Contributing Author, Spear Education