How to Minimize Peri-implant Abutment Complications
By Robert Winter on May 17, 2016 | comments Maximizing soft tissue health is essential for the long-term success of an implant. Establishing an environment where a strong biological barrier can develop can minimize the penetration of bacteria through the soft tissue and allow a tight adherence to develop between the implant and soft tissue.1 This helps prevent bacterial migration to the head of the implant and development of inflammation or infection. The two zones of soft tissue facing the abutment surface that are most at risk for contamination are the coronal junctional epithelium and the more apical connective tissue. Internal implant colonization by bacteria is also of great concern.
Minimizing Chairside Adjustments
During laboratory fabrication of the abutment or clinical adjustment prior to its insertion, debris and contaminants (titanium particles, polisher remnants and oil from handpieces) remain on the surface of the abutment and may cause soft tissue inflammation that can negatively affect the tissue’s adherence to the abutment.
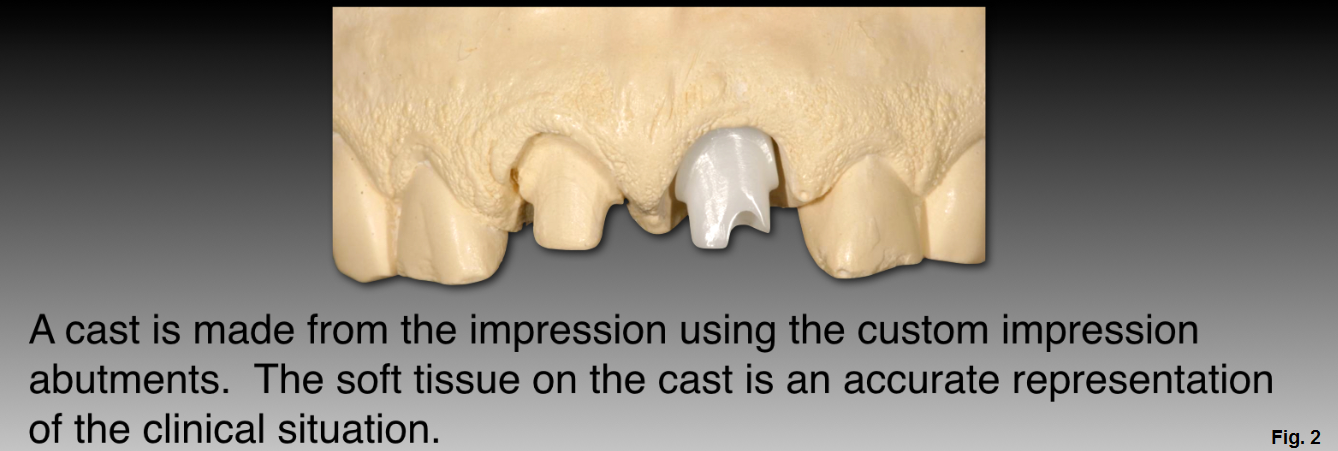
Whether using CAD/CAM or traditional lab techniques to fabricate abutments, the goal is to minimize the need to make chairside adjustments. Minimizing adjustments chairside can be most easily facilitated by using provisional restorations to guide soft tissue healing and fabrication of a custom impression abutment once the tissue is healed and stabilized. The technician uses the custom impression abutment to fabricate a soft tissue model to represent the tissue level.
Without following these steps, the tissue representation on the model is incorrect, and the technician uses their own judgment to adjust the soft tissue model to create space for the abutment and determines its shape. After the abutment is fabricated, the clinician then has to make contour adjustments to relieve excessive pressure on the tissue at the time it is inserted. If the pressure on the tissue is not relieved, it can create negative or unaesthetic tissue movement.
Even when provisionalization is used to guide tissue healing, there are times when adjustments are necessary to reshape the surface of the abutment that contacts tissue, increasing the chances of debris accumulating. Cement retained in the sulcus is another factor that contributes to soft tissue inflammation and is a significant cause of peri-implantitis.2 Cement’s rough surface can retain microbes and inhibit their removal, so care must be taken to ensure that all excess cement is thoroughly removed.
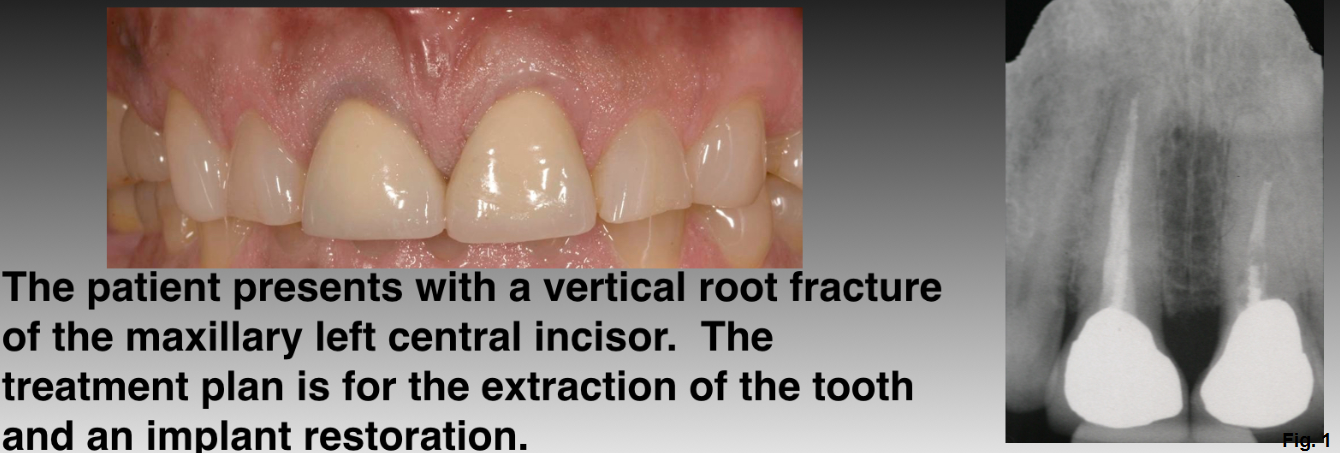
We'll use this patient's treatment plan as an example. (Figures 1 and 2)
3 Steps for Zirconia Abutment Adjustments to Achieve a Surface Conducive to Soft Tissue Adherence
- Start with the blue Dialite polishing wheel (Brasseler L26DBC)
- Proceed with the pink Dialite polishing wheel (Brasseler L26DRM)
- Complete the polishing with the gray Dialite polishing wheel (Brasseler L26DGXF)
If the surface of the abutment is too coarse or rough, it acts as an irritant and the tissue does not adhere well. It also creates an environment for bacterial growth. If the surface of the abutment is too smooth, the soft tissue has difficulty adhering and can gradually ‘slide’ down the abutment and move in a more apical direction. Using a goat hair bristle brush and diamond polishing paste creates a surface that is too smooth. Scratches on the abutment that remain after polishing with the gray Dialite (0.17 µm), are the best size for tissue adherence.3
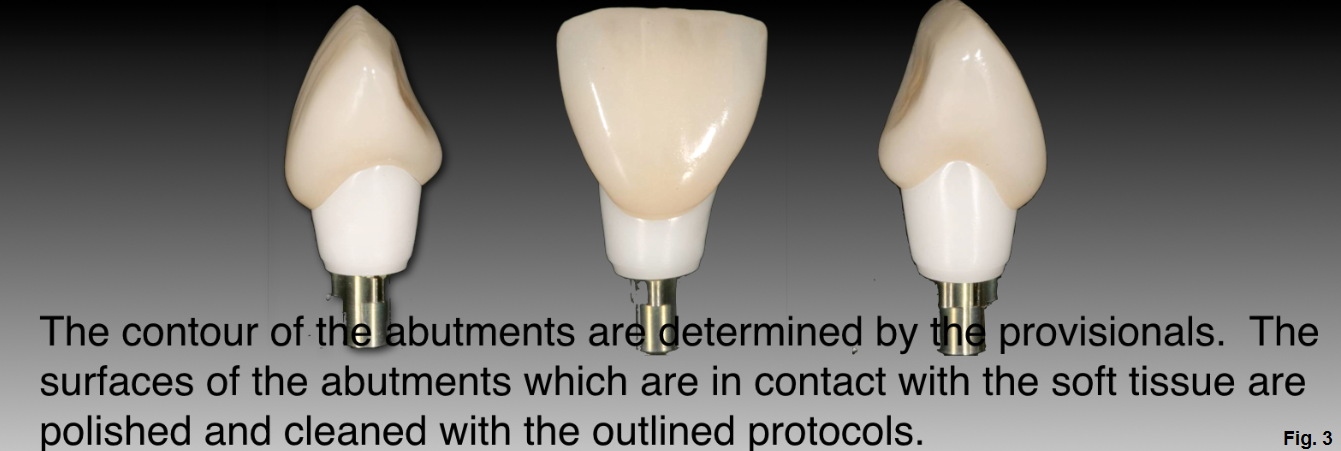
After adjusting the shape and polishing the surface of the abutment, it must be thoroughly cleaned. (Figure 3)
3 Steps for a Thoroughly Cleaned Abutment
- Ultrasonic cleaning for 5 minutes with Enzymax (Hu-Friedy).
- Steam clean for 10 sec at a 5 cm distance.
- Place into a sterilization bag or wrap and sterilize.
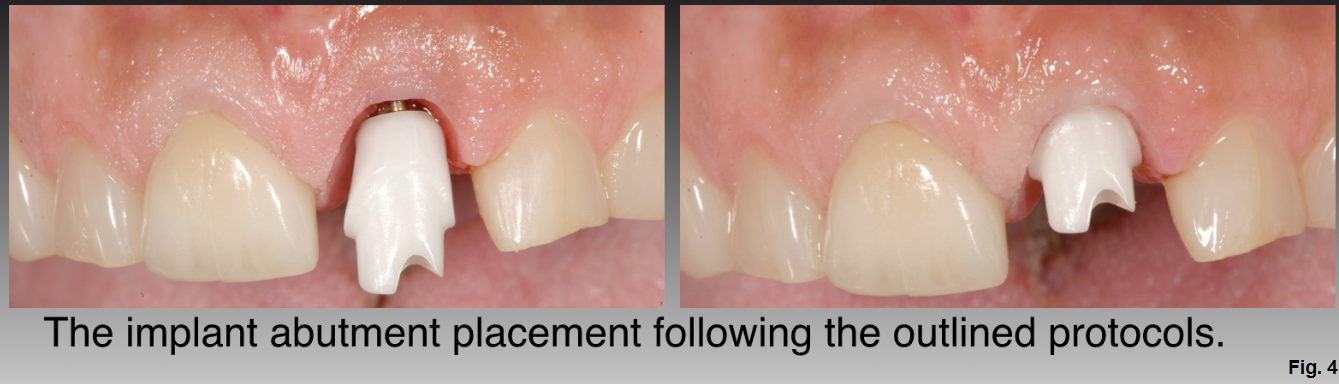
In the future, routine cleaning and sterilization may include the use of ultraviolet light or plasma of Argon. More research is needed to determine the effect of these procedures on different types of abutment materials. Once the abutment is cleaned and sterilized, it's ready for clinical insertion. (Figure 4)
12 Steps for Clinical Insertion
- Remove the provisional restoration or healing abutment.
- Inspect the head of the implant to determine if it is free of soft tissue and bone.
- Rinse the implant head thoroughly.
- Decontaminate the area with 1% chlorhexidine.
- Place EZ Seat onto the screw and apical portion of the abutment.
- EZ Seat is made by compounding pharmacies and consists of a lanolin base with 5% tetracycline and 2% hydrocortisone.
- Seat the abutment onto the head of the implant.
- Take a radiograph to confirm the abutment is completely seated
- Complete the final torquing of the screw following manufacturer recommendations
- Using a new screw is recommended
- Place Teflon tape into the access opening to the screw
- Place an opaque composite (ex: Tokuyama Estelite Omega) leaving a slight depression
- This depression will act as a reservoir for excess cement and prevent incomplete seating of the final crown
- Use a two-retraction cord technique to prevent cement from getting into the sulcus, with the cords overlapping in the interproximal areas. (Figure 5)
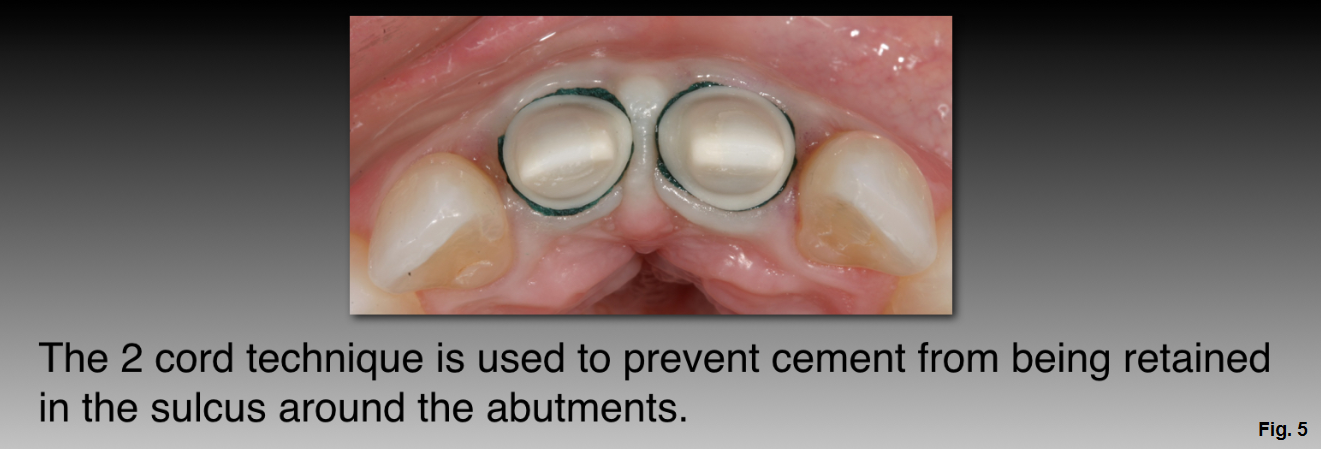
- The first cord is placed on the distal aspect of the abutment just palatal to the crown’s interproximal contact point.
- This cord extends onto the facial aspect and to the mesial aspect of the abutment, just palatal to the contact point.
- The second cord is placed in the palatal sulcus, extending just facial to the mesial and the distal contact points.
- Take care to place the cord apical to the margin to prevent trapping it under the crown margin during cementation.
- The first cord is placed on the distal aspect of the abutment just palatal to the crown’s interproximal contact point.
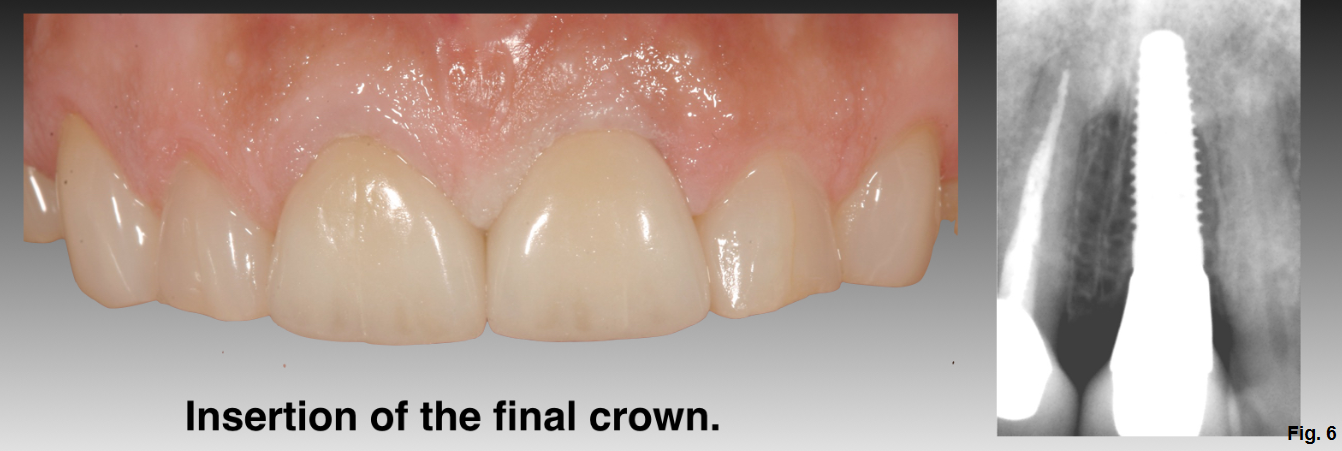
- After the crown is cemented, the cords are carefully removed, one towards the labial aspect and one palatally, to ensure that no cement is left in the sulcus. (Figure 6)
The patient's home maintenance should include daily brushing, flossing, and the use of a topical antioxidant like AO ProVantage Gel and AO ProRinse (PerioSciences). The natural topical antioxidants contained in the gel promote oral homeostasis, enhance wound healing, prevent oxidative damage caused by dental procedures and materials, and have proven antibacterial properties. The essential oils in the mouthwash (menthol and thymol) have an anti-plaque and anti-gingivitis effect without damage to tissue cells, and the antioxidants (phloretin and ferulic acid) have beneficial effects on functional mechanisms that regulate fibroblast migration and proliferation during gingival healing or periodontic repair.4
Properly handling and cleaning the abutment, along with appropriate patient home maintenance, will help reduce the prevalence of peri-implantitis and improve the overall success of your cases. (Figure 7)

(Click this link for more dentistry articles by Dr. Bob Winter.)
Bob Winter, D.D.S., Spear Faculty and Contributing Author
References
- Canullo L, Penarrocha-Oltra D, Marchionni S, Bagan L, Penarrocha-Diago M, Micarelli C. Soft tissue cell adhesion to titanium abutments after different cleaning procedures: Preliminary results of a randomized clinical trial. Med Oral Medicina Oral Patología Oral y Cirugia Bucal 2014.
- Wilson TG. The Positive Relationship Between Excess Cement and Peri-Implant Disease: A Prospective Clinical Endoscopic Study. Journal of Periodontology 2009;80(9):1388–1392.
- Happe A. Managing the peri-implant restorative interface in the esthetic zone. Presentation at the American Academy of Restorative Dentistry Annual Meeting. March 1, 2014.
- Miguel SMS, Opperman LA, Allen EP, Zielinski JE, Svoboda KK. Antioxidant combinations protect oral fibroblasts against metal-induced toxicity. Archives of Oral Biology 2013;58(3):299–310.