10 Steps to Posterior Crown Prep
By Jeff Lineberry on December 17, 2021 | 1 comment
Crown preparations are a common restorative procedure that we encounter every day. With that being said, it should be a quick, predictable and easy procedure to do.
In this article, I will do a quick review of a method that has worked for me and offer a step-by-step guide to get your preparations done quickly and efficiently. The guide will also help you ensure your final crown preparation allows you to give your patient an excellent final restoration.
First and foremost, you have to begin with the end in mind, meaning that you have to decide the type of material out of which your crown will be made. Will it be monolithic or layered? Gold, PFM, e.max or zirconia?
Why must you think about this first? Because each material requires different reduction amounts and preparation design – and you must decide which will allow you to reach or exceed your patient's final desired end result.
Once you have decided what is best for your patient and their situation, where do you start?
Preparing posterior crowns
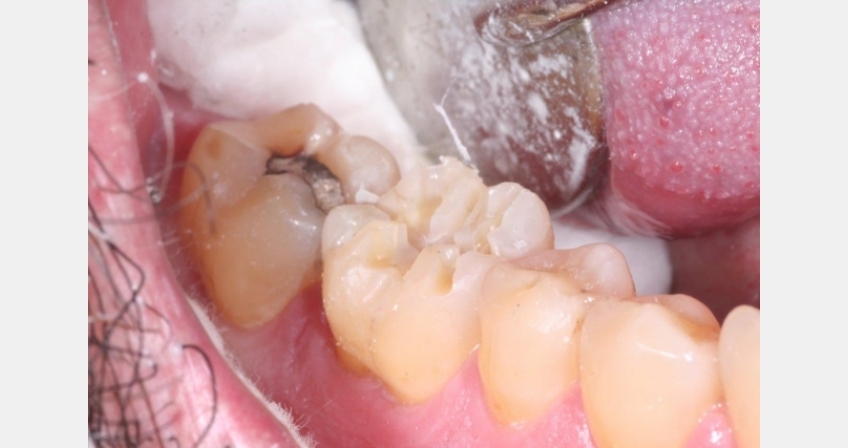
- Remove old restorative material and decay to verify restorability in its current state and need for possible root canal therapy and/or crown lengthening. I also determine if a crown restoration is going to be the most conservative and longest lasting or would the tooth and patient be better served doing an inlay or onlay restoration?
- Isolate the tooth for proper bonding and adhesive protocol to place the build-up material of choice (personally, I like light cured resin and/or dual cured resin in areas that light penetration may be challenging. Ensure that your build-up material and bonding agent are compatible). Don't overbuild the tooth as this wastes material but also can affect the simplicity of the next step.
- Now we are ready for the crown preparation (if a tooth will definitely need a crown, e.g. root canal posterior molar with large filling, then I will start with this step first). First thing first: I start with depth cuts on the occlusal table with a known length bur (there are specific depth-cutting burs as well) that is for the needed reduction of the restoration of choice. I take this bur down the central groove, across the cusps, and out the grooves to depth. Now, there is no confusion of how much to remove.
- I will then place a small diameter bur (KS0 is my bur of choice) to remove the pieces of tooth that are sticking up between the depth cuts. I essentially place the bur in the groove and either push or pull, which cuts or “amputates” that segment of the tooth off rather quickly and efficiently.

- I will then take the same bur on the facial and lingual and do depth cuts in two planes: in the incisal 1/3 and then to an approximate area of margin area along the gingival height. This bur is 1mm in diameter, so adjust as needed for material choice. Be sure that you account for facial/lingual area where you need added thickness for the functional cuspal area.
- Place the bur back in the depth cuts and pull/push again to remove the segments of tooth remaining between the depth cuts quickly. It is more efficient to cut these segments away vs. milling the tooth back and forth at this stage. Once the enamel is reduced, then you can easily smooth and refine the margins.
- Carry the bur carefully between the interproximal areas to break contact and follow the gingival contours and/or restorative material.

- Rough finish the margins with this bur and round off any immediate edges or ledges.
- Switch to a larger, finer diamond bur to refine and smooth margins and preparation overall.
- Done!
The majority of the teeth I prepare day in and day out are posterior teeth, but here is a link to an excellent video in Spear Education Course Library on anterior tooth preparation. I have also taken the restorative design workshop, a hands on course that is an excellent review of preparation design, and you get to prep a lot of teeth on models as well!
Read more articles by Dr. Jeff Lineberry here.
Jeff Lineberry, D.D.S., F.A.G.D., FICOI, Accredited Member-AACD, Spear Visiting Faculty, practice owner and contributing author for Spear Digest.
Comments
November 6th, 2015