When approaching a full arch implant supported prosthesis, it is critical to ensure your lab has the best possible gingival topography for the pontic sites. Often, while making impressions or intraoral scanning, it is difficult to capture the gingival topography in detail. The impression may be slightly altered by the time the provisional is removed and the impression copings secured after a radiograph validating that they are seated all the way
This visual essay shows a simple way to communicate and transfer the gingival topography during the impression process to the laboratory via the master cast. You'll then see how to precisely capture any minor variations in the junction between the gingiva and the prosthesis, by injecting auto-polymerizing low shrinkage PMMA material during the try-in appointment.
This then is easily transferred to the laboratory and the technician can add this contour to the intaglio surface and ensure intimate adaption between the pontic and the overlying tissue, creating an aesthetically pleasing result and a hygiene accessible contour.
Techniques to Transferring Pontic Site Gingival Topography to Your Lab
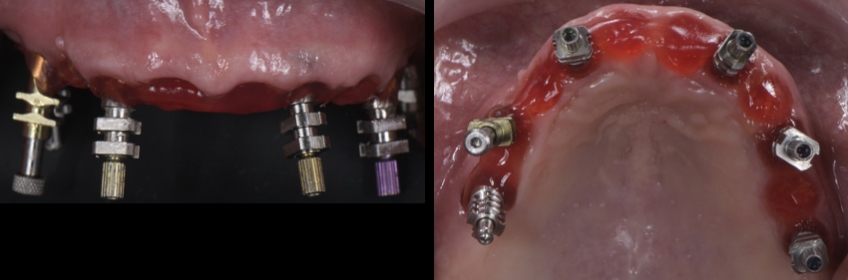
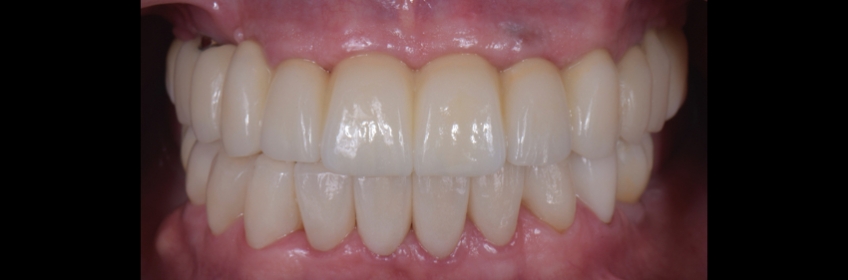
Fig. 1. Buccal and occlusal view of the preliminary implant supported provisionalFig. 2. Frontal and lateral view of the preliminary provisional with the developed pontic sitesFig. 3. Buccal and occlusal intraoral view of developed gingival topography 2 months' post-extraction.Fig. 4. GC pattern resin used as a method to splint the impression copings and to support/copy the developed pontic sites.Fig. 5. Frontal and occlusal view of the milled PMMA implant supported prototype on the master cast.Fig. 6. Intaglio view of the milled PMMA implant supported prototype.Fig. 7. Intraoral buccal view of the milled PMMA implant supported prototype.Fig. 8. Buccal and occlusal intraoral view of developed gingival topography 1-month post-insertion of the new PMMA implant supported provisional.Fig. 9. Frontal view of definitive implant supported zirconia prosthesis.Fig. 10. Intaglio view of the definitive implant supported zirconia prosthesis.Fig. 11. Intraoral buccal view of the definitive implant supported zirconia prosthesis, note the missing ceramic to support the pontic areas.Fig. 12. Self-curing pattern resin is injected in the junction between the intaglio surface and the soft tissue in order to capture the missing ceramic to support the pontic areas.Fig. 13. Frontal view of the Self-curing pattern resin recreating the missing ceramic in those areas, in order for the lab to add porcelain exactly where it's needed.Fig. 14. Frontal and intaglio view of the definitive prosthesis after the pontic area modification.Fig. 15. Frontal and occlusal views of the maxillary arch during the insertion appointment.Fig. 16. Intraoral buccal view of the definitive zirconia implant supported zirconia prosthesis on the maxilla and tooth supported rehabilitation on the mandible.
Ricardo Mitrani, D.D.S., M.S.D., is a member of Spear Resident Faculty.